A Beginner’s Guide to Shooting Manual Film Cameras
Learn How to Use Mechanical SLRs, TLRs, and Rangefinders
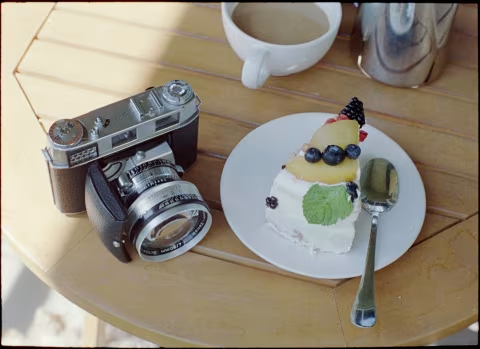
27 min read by Dmitri ☕️, with images by Daren Zomerman.I love point-and-shoot cameras❤️🔥.
They’re quick to operate, they can fit in a pocket, and they need no light meter or an eye for Sunny 16.
But unfortunately, like all modern technology, they break. As their numbers diminish along with the growing ranks of new film photographers, the prices increase.
Lucky for us, film photography has been around for nearly two hundred years; the manual SLRs, TLRs, and rangefinders made by billions are durable, plentiful, and varied.
You can still find a century-old camera in good working condition for under $100. It may not set the focus or exposure for you automatically, and it likely won’t fit in a pocket. But vintage mechanical cameras are cheaper, easier to fix, and they may give better results than pricier point-and-shoots.
And if that’s not enough, mechanical film cameras will give you more creative control over your blur and brightness, they often need no batteries, they will readily accept films with no DX-code (like the new Lomochrome Color’92), and they will make special effects like double-exposure possible.
In this guide, you will learn:
How to take advantage of the great wealth of working, serviceable film cameras by mastering exposure and manual focus.
Having read this article, you’ll be able to pick up and shoot any 35mm or medium format film camera from any time period.
While your point-and-shoot will rarely have you thinking of exposure values, older manual cameras need a more thoughtful approach. Each scene is to be measured; your decision about how to interpret those measurements and your film and camera’s capabilities will influence your photograph greatly.
You don’t need years of experience or a college degree in photography to start shooting manual film cameras today. If you’ve got a camera, this article will guide you through the entire process of using it well.
👋 Wait! You should at least know how to load film into your camera before reading any further. I also recommend you check out a short article explaining what exposure is and how it can be measured.
Free printable PDF book download.
This guide will take about 20-30 minutes to get through. A free PDF download is available if you’d like to print it or read it offline:
➜ Free Download: A Beginner’s Guide to Shooting Manual Film Cameras (PDF)
You’ll be asked to sign up for a free account with Analog.Cafe. It comes with access to more downloadable guides, additional website features, and a monthly community newsletter.
TL;DR:
Get a light meter app, tell it your film’s ISO speed, point it at whatever/whoever you’d like to photograph and set your camera’s aperture (numbers like 2.8, 4, 5.6, 8) and shutter speeds (numbers like 30, 60, 125, 250) to whatever the app tells you. You may need to play around with your app if the numbers it gives you aren’t found on your camera. Some lighting conditions will not suit your film; ISO 400 film will work in most outdoor and well-lit indoor settings. Avoid shutter speeds below 125.
If you have a rangefinder camera, adjust your lens so that the ghost images align; if your camera doesn’t have a focus aid, guess the distance. Press the shutter. Advance to the next frame. Repeat until you reach the end of your film roll. Rewind. Take your exposed film to your lab or develop at home.
But of course, there’s more to shooting manual film cameras than that. This guide will explore the camera settings further (below) and then move on to measuring brightness and setting the focus precisely with various instruments.
Above: FED-2 — a manual rangefinder film camera.
Understanding your camera’s shutter settings.
One of the most important parts of your camera is its shutter. It’s also the most mechanically complex piece, and for a good reason: modern film takes an extremely short time to register an image, often measured in hundredths of a second. Such high speeds and accuracy are necessary to “freeze” the motion and avoid motion blur — since most of us prefer photos that are crisp, well-defined, and free of smudges.
Motion blur can be controlled with a shutter. A faster shutter speed would decrease the blurring of fast-moving actions (shutter speed is often expressed in fractions of a second, i.e., 1/125s, 1/250s — your camera may just mark those speeds as 125 and 250).
A faster shutter speed will also let in less light.
Fast-moving objects aren’t the only things that introduce motion blur into your photos. The barely-perceptible and ever-present shaking of our hand and body movements can smudge your photos even if you aren’t consciously moving and your scene appears still. Depending on your skill and the lens (longer/“zoomed-in” lenses are more prone to this), you will start to notice camera shake in your images at shutter speeds of 1/125s and slower.
Though slightly cumbersome, a tripod with a remote (bulb) trigger will prevent camera shake. Using this simple tool, you may take exposures that are slower than 1/30s — even full seconds, minutes, hours, and even days! Of course, wind and moving objects may still introduce motion blur, even with a tripod.
✪ Note: If you’re planning to take exposures longer than one second, know that your film may not behave as you expect (its sensitivity will decrease). This phenomenon is called reciprocity failure.
Another way to prevent motion blur is to use a camera flash. The link above explains how to use it with a manual film camera.
In addition to fractions of seconds, shutter speeds can be measured in relative units: stops. On your camera, shutter speeds are typically incremented in stops, i.e., 30, 60, 125, 250, 500 — where each following number is exactly one stop less light (or half the light) reaching film than the one before. By the same token, each next number doubles¹ the shutter speed.
An increase in one stop implies doubling, whereas a decrease suggests halving. Stops are used to sync your shutter speed settings to your camera’s aperture and your film speed.
¹ — 125 isn’t exactly twice the double of 60: this is a modern convention for shutter speeds that makes counting stops and synchronizing with other camera settings easier. On 60+ year-old cameras, you may find a slightly different progression of shutter speeds (i.e., 25, 50, 100, 200) but such difference can be ignored in most cases.
Understanding your lens’ aperture.
Faster shutter speeds prevent motion blur; they also decrease the amount of light entering the camera. But the shutter isn’t the only tool that controls light and blur: an aperture can do that, too.
Your lens’ aperture is like an eye’s iris; it can open wide to let in more light or shrink to decrease the amount of light that enters the camera.
This additional control extends your camera’s abilities in ever-changing lighting conditions. For example, wider apertures can let in more light for the shutter to work with; with more light, the shutter can fire faster², thus decreasing the motion blur. Smaller apertures can limit the light that may be too bright for the film to register and too strong to cut with even the fastest shutter speed.
Apertures introduce their own type of blur: lens blur. Lens blur is the result of a wide aperture decreasing the area around your focus point that stays sharp. If you focus your camera correctly, a wide aperture won’t prevent your subject from staying in focus; however, everything behind and in front of them may become blurry.
² — As more light enters the camera when you switch to a larger aperture, a faster shutter can be used to decrease that total volume of light to the previous level. Keeping the amount of light consistent is very important for making correct exposures on photosensitive film. More on that below.
The size of the area that stays in focus while the rest becomes blurry (depth of field) varies depending on the focal length of your lens, the distance between you and the focal point, and the size of an aperture. Depth of field can be razor-thin with certain lenses, so much so that if you are taking a portrait, your subject’s eye may be in focus, but their nose is blurry. Smaller aperture sizes and wide-angle lenses increase depth of field, making more of your scene appear in focus. Focusing on elements closer to the camera decreases the depth of field, whereas everything shot at the infinity focus (~100m/300’ or further) will stay sharp regardless of your lens or aperture.
Lens apertures don’t use time values like shutter speeds. Instead, they use f-numbers, the most common being 𝒇1.4, 𝒇2, 𝒇2.8, 𝒇4, 𝒇5.6, 𝒇8, 𝒇16, and 𝒇22. Each higher number halves the amount of light that enters the camera (decreases by one stop). The fact that a larger f-number implies a decrease in the size of an aperture and the amount of light entering the lens (plus the strange pattern of numbers and decimal values) may seem confusing at first. But there’s a mathematical reason for this. (You also don’t need to know the math behind the f-numbers to use them well).
The f-numbers in the progression are conveniently selected for being exactly one stop apart and, thus, are easy to sync with the shutter speeds. For example, if your camera is set to use an aperture of 𝒇2.8 with a shutter speed of 1/500s, you may change your settings to 𝒇4 + 1/250s without altering the amount of light that enters your camera. Remember: 𝒇4 lets in one stop less light than 𝒇2.8 and 1/250s (being a slower shutter speed) lets in one stop more light than 1/500s.
While doing the above does not change the amount of light that enters your camera, it changes the quality of your image. As a photographer, you are choosing the type of blur your camera renders: a slower shutter means more motion blur and a wider aperture (smaller f-number) means more lens blur (smaller depth of field). In most cases, photographers prefer less motion blur and are OK with lens blur as long as the focus is set correctly (this is one of the reasons photographers may seek lenses with larger maximum aperture — even when they are heavier and more expensive to build).
Lenses with wider maximum apertures are often called “faster” lenses. Some photographers use such lenses combined with close focus to exaggerate their lens blurring (called bókèh) for an artistic effect. Lens designs, aperture types, and build quality affect bokeh greatly. I consider it in all of my lens reviews; however, I also try not to overuse this effect. It is not appropriate, nor is it possible to achieve for every image.
☝︎ Further reading: “What Is an Aperture and How Does It Work?”
✪ Note: While all cameras must have a shutter and an aperture, some cameras may have a single fixed shutter speed, a single fixed aperture — or both. Examples of such cameras are the Lomography Diana Mini with a single shutter speed (excluding the Bulb mode) + two apertures and the Lomography Super Sampler with a single shutter speed and a single aperture. These limitations make cheap manufacturing possible.
You may also like to learn about optimal aperture values for best resolution and sharpness.
Above: The new CineStill 400D colour film with an ISO 400. Most films mention their ISO speed in the name.
Understanding film sensitivity.
Being able to precisely control the amount of light that enters the camera with various shutter speeds and apertures is an essential skill for any photographer. But it’s also important to understand the reason for doing that: avoiding over- and under-exposures.
In simple terms, an over-exposure is a situation when there’s so much light entering the camera that the film renders your image too bright or completely white. By the same token, an under-exposure is a case of film registering an image that’s too dark or completely black.
☝︎ Further reading: “How to Make Perfect Exposures on Film” — this guide has a section of particular relevance to the above 👉 “Identifying underexposure and overexposure.”
Our eyes adjust to various lighting conditions without our knowledge, but even they need to limit the amount of light that enters the retinas on a sunny day and open up the irises to let in more when we’re indoors or in the shade.
You may also remember that human eyes have two types of light receptors: rods and cones. Cones are our most-used cells that let us see daylight in colour. But when it gets dark, our bodies switch on rods that are much more sensitive in dim light (although we can only see in monochrome with the rods).
Before I get back to talking about film cameras, keep in mind these three concepts about the human vision system:
1) Our eyes constantly adjust the amount of light that enters them using an iris — an eye’s aperture — this ensures that our retinas always receive a volume of light that’s within our receptors’ sensitivity range (i.e., to avoid “over-” and “under-exposure”).
2) Our eyes have two light receptors: cones (for most vision needs, in colour) and rods (for night vision, in black and white).
3) We can’t use our rods in daylight as they would be “over-exposed” since the pupils can’t contract enough to limit the light sufficiently (plus, colour vision is more advantageous). And we can’t use cones at night as they aren’t sensitive enough in low light. Each system has advantages and drawbacks; our body’s job is to select the best tool for the job.
The above concepts are also true in photography. Apertures’ function is practically identical to the iris (#1), whereas #2 & #3 are paralleled with our various options when it comes to choosing film.
Photographic film comes in a variety of sensitivities — there’s a lot more choice than just rods and cones:
“Fast” or highly-sensitive emulsions, like Kodak T-MAX P3200, are best suited for taking photos in subdued light or with smaller apertures and faster shutter speeds (both of which allow less light into the camera). The downside of such films is their relatively large grain and the lack of options if you like to shoot colour.
“Slow” or low-sensitivity emulsions, like CineStill 50D, are best suited for taking photos in bright light with larger apertures and slower shutter speeds (both of which allow more light into the camera). These films often have finer grain and more colour options.
Modern film marks its sensitivity in ISO values, the most common being 25, 50, 100, 200, 400, 800, 1600, and 3200. Like shutter speeds and apertures, the above values are separated by one stop, where 50 is one stop “faster” (more sensitive) than 25 and so on.
In photography, film sensitivity is often referred to as film speed.
✪ Note: Some light meters and expired films may list ratings using other than ISO, such as ASA, ГОСТ, and DIN. You can convert those values using the Film Speed web app.
☝️ Shutter speeds, apertures, and film sensitivities are the basics of photographic exposure. I hope you understand by now what each of these terms means and how they work. The next section has a few practical examples that tie all of the above together.
Cameras pictured above: Vitessa A (right) — a German foldable manual film camera with a fast 𝒇2.0 Ultron lens, built in the 1950s. FED 5B (bottom-left) — a Soviet rangefinder built in the 1980s. Bolsey “Model C” (top-left) — one of the few 35mm TLRs.
Combining shutter speeds, apertures, and film sensitivities to make exposures.
Reciting the Sunny 16 rule is a fantastic way to understand and visualize how typical camera settings and film sensitivities may be used to create a photograph.
The rule dictates that to get a correct exposure (a photo that is neither over- nor under-exposed) using a common ISO 100 film in bright daylight, you’ll need to set your camera’s aperture to 𝒇16 and the shutter speed to 1/125s.
In the above chapter about aperture, you’ve learned that you can get the same amount of light onto film with an 𝒇11 + 1/250s and 𝒇8 + 1/500s. This is good to know because the faster shutter speed (500) can help you freeze motion better if, for example, you’re photographing sports or fast action.
Sunny 16 rule is approximate, but it works well. It states that to get a correct exposure in full sun, you must set your shutter speed to 1/ISO and your aperture to 𝒇16. And since ISO numbers don’t line up with shutter speeds precisely, the closest value can be chosen. For example, an ISO 100 film can be matched with a 1/125s shutter speed, same as ISO 400 film can be matched with a 1/500s shutter speed.
If you’re shooting with a slow film, i.e., ISO 25, you’ll need to use a shutter speed of 1/30s with 𝒇16 in full sun — which will likely cause blurry photos due to camera shake. A safe shutter speed³ of 1/250s can still be used, however, by opening your aperture wider to 𝒇5.6.
I got the 1/250s + 𝒇5.6 numbers by first finding the difference in stops between 1/30s (shutter speed prescribed by the Sunny 16 rule) and 1/250s (my wanted shutter speed). According to the progression mentioned above (it should also be plainly visible on your camera’s shutter settings toggle), 1/30 to 1/125 to 1/250 is two stops faster than the target 1/30s. Two stops faster implies that there will be two stops’ less of light entering the camera, and so to maintain the correct exposure, we must add two more stops of light with an aperture, which is 𝒇16 to 𝒇11 to 𝒇5.6. The calculations described in this paragraph are an example of the process called exposure compensation.
Without a light meter, you’ll need to perform this type of math each time the lighting conditions change or if you wish to increase/decrease motion and lens blur. Alternatively, you can use a free web tool called Sunny 16 Calculator that makes all the calculations for you and even shows a visual guide for various lighting conditions.
However, without vigorous training, the human eye is not very good at detecting minute changes in ambient light intensities. Thus, a light meter is a very useful tool that most photographers employ to their advantage.
³ — An approximate safe shutter speed can be estimated by taking the reciprocal of your lens’ focal length. For example, for a 50mm lens, a shutter speed of 1/60s should be relatively safe. There are many factors that influence camera shake (including your camera’s shutter design and quality), and thus, I usually try to set my speeds even faster than that.
Measuring the brightness of a scene with a light meter.
Light meter design has changed many times over the past hundred+ years; even today, it continues to evolve as part of digital camera systems and stand-alone apps and devices. But its core function has always remained the same: provide appropriate shutter speed and aperture values for the available light and your film’s ISO.
One of the simplest, cheapest, and most accurate ways to measure light in 2023 is with a phone app. Most such apps work by having you input your film speed (ISO) and then pointing the camera at your scene or subject. The app will then give you options for aperture/shutter speed combination and a preview of how your image may look on film with those settings.
Many excellent light metering apps are free (e.g., Lumu), and they include advanced features like spot metering that are rarely found on vintage equipment. I feel like I especially benefitted from the live preview feature as it helped me visualize the effect of my camera settings and the differences in available light at various points in my scene in real-time.
But, of course, these apps aren’t ideal for all possible scenarios. An external light meter with physical controls is faster and more convenient to use, plus it can measure light in ways an app can’t.
Your manual film camera may even come with a conveniently built-in light meter that may function separately from your camera (i.e., you will still need to transfer the values from such meter onto your camera’s shutter and aperture controls). Many consumer-level vintage cameras use a match-needle meter that will simply tell you how far you are from a correct exposure as you adjust your camera settings. Many of those meters can even work without batteries by converting the energy of the reflected light.
I think that the best way to learn how to use a light meter is to take it into the field. An app will give you real-time feedback, and you can even use it together with your camera’s or external light meter to get the hang of the tool.
Of course, you can always learn more about these fascinating devices, how they work, and how to make the best use of them beforehand from my recent guide on the topic: “How to Use a Light Meter With a Film Camera.”
✪ Note: As you try various equipment and apps, you may notice that some shutter speeds, apertures, and film ISO values may look unfamiliar. For example, 1/750s, 𝒇3.5, and ISO 160 are not part of the progressions I list in this article — they are in between the whole-stop values. Typically, they are either half-stop or third-of-a-stop increments meant for increased precision or the manufacturer’s desire to showcase even the smallest increase in performance. In most cases, they can be safely ignored.
Photographic film’s tolerance towards exposure mistakes.
My advice to round exposure numbers, ignore precise stop fractions, and my personal habit of estimating exposures by simply looking at the scene may suggest that film is tolerant of mistakes and imperfections. That’s true in many but not all cases.
You may have also heard of “metering for shadows.” In my guide to perfect exposures, I discuss this concept in detail; but in short, pointing your light meter to the shadows forces it to produce numbers that will direct more light onto film than it would otherwise. Depending on your scene and your light meter, metering for shadows can give you a variety of readings, some of which may send 2-3 stops more light onto film than the meter was designed to indicate. Thankfully, many colour and monochrome negative films can handle some over-exposure gracefully. But that is not the case with all films.
Slide films handle under-exposures much better than over-exposures, whereas some films will need very precise measurements. Reading film reviews may help you get a sense of how well your film will tolerate imperfect light readings. On this blog, I also list each film’s dynamic range — a number that will tell you exactly how much over/under-exposure the emulsion can handle and the types of scenes you can shoot with it.
Films with a dynamic range of 7-12 stops can handle imprecise exposures the best. They can also be safely used in high-contrast lighting. Anything less than that will not be so kind; unless you want your images to show extreme contrast with inky blobs for shadows and blown-out highlights⁴, I suggest you meter as precisely as you can and choose scenes with low-contrast lighting (such as foggy afternoons or shady outdoors).
⁴ — While this and other photographic guides use terms such as “correct” for exposure, focus, etc., the correctness is anchored in an assumption that you want to render a scene as seen by the human eye. But photography is a creative medium, and thus, I believe you should feel free to make decisions about how your images look beyond the “normal.” Even if not intended, technical mistakes will not necessarily diminish the value of your images.
Above: Olympus OM-1 — a classic Japanese SLR camera with a cult following still talking about it today.
Focusing with SLRs.
Using an SLR is perhaps the most intuitive way to set focus. The small window at the back of your camera — the viewfinder — will show you a preview of your scene as it may appear on film. Whatever’s out of focus will look blurry, and you’ll be able to see the focus change in real-time as you adjust the distance setting on your lens.
The downside of an SLR focusing system is that smaller apertures let in less light to the point of the viewfinder image appearing much darker than the actual. This can make focusing very difficult. To counter that, you may like to focus at the widest aperture and then adjust it to an appropriate value for your exposure before taking the shot. Most SLRs I’ve tried do this automatically (as long as you are using native-to-the-system lenses) and let you preview your selected aperture’s depth of field with a press of a button (reminder: depth of field is the area of your scene that appears in focus; it widens at smaller apertures).
Another downside of an SLR-type system is that the focus you are previewing in the viewfinder is not very accurate. The image you’re seeing is small, which makes slight mistakes in focus non-obvious (but quite visible once you print or display your photograph large). Thankfully, this problem is usually taken care of with a split-prism area in the middle of the frame. It often appears as a small circle that will show that part of your image is fuzzy or broken until you focus on it perfectly.
The main advantage of an SLR system⁵ is, of course, the ability to use telephoto and macro lenses, which aren’t practical on any of the other camera types.
⁵ — In photography, cameras are most often classified by their focusing system. Whereas the other two main components — shutters and apertures — function relatively similarly, focusing systems greatly influence your camera’s design and usability.
✪ Pro tip: Larger apertures produce smaller depths of field, which are less forgiving to focusing mistakes. As a beginner, you will have better luck with faster films (ISO 400-800) that will let you shoot smaller apertures (for larger, more forgiving depths of field) and faster shutter speeds (to prevent camera shake).
Focusing with TLRs.
TLRs are the predecessor design to SLRs. The double-barrel design consists of a main picture-taking lens and an exact copy used exclusively for focusing and framing your shots.
Unlike SLRs, focusing lenses on TLRs are always set to their widest apertures, and thus, you can not get a depth-of-field preview on this type of system. Although, I would argue that DOF preview is not an essential feature.
Another notable difference is that you will need to focus by looking through a large viewfinder at the top of the camera. Unfortunately, despite TLRs’ focusing screen/viewfinder appearing much bigger than the peephole at the back of an SLR, you need to keep it about a forearm’s length away from your eye. For precision focus, instead of a split prism, you can sometimes use a built-in magnifying glass. Lastly, TLR viewfinders are often hidden behind a cover that pops up to form small walls around the focusing screen to guard it against light reflections, which can otherwise make it difficult to use.
A peculiar property of a TLR camera is the left-to-right reversal of an image in the viewfinder — as if you’re looking into a mirror (because you are). It may take a couple of days to get used to using a camera like that, and it will always take longer than with an SLR, but it’s not at all debilitating. In fact, I find it creatively refreshing.
TLRs do not have the same options for telephoto or macro lenses. More often than not, you can use just the one lens your camera came with. I don’t think of this fact as a disadvantage; a single well-designed general-purpose lens is often all I ever need, plus the simpler design often yields a lighter and more reliable device.
A true disadvantage of a TLR design when compared to SLRs is the parallax error. It affects framing in the following way: while the focusing screen is often good at showing you exactly which parts of your scene will end up on film, objects that are positioned closer than 3m/9’ will appear higher than they would on film. This is because the picture-taking lens is positioned below the focusing lens — a difference that becomes more consequential at closer distances.
⁶ — A photo by Daren from LearnFilm.Photography. Check out his very relevant article, “Are TLR Cameras worth it?”
Above: FED 2 — a Soviet copy of a much more expensive Leica II classic rangefinder design.
Focusing with rangefinders.
Rangefinder cameras can look similar to SLRs. However, when you look through their viewfinder, everything will always appear in focus. There is no depth-of-field preview, but also no decreased brightness with smaller apertures. Parallax error exists on rangefinders — same as on TLRS; however, many rangefinders use moving frame lines that show exactly which part of the scene will appear on film.
The main mechanism of focus on a rangefinder is a ghost image that you need to align with the main image to achieve focus. It may appear a little strange to those who’ve never used this system, but it is as precise as a split-prism aid on SLRs and is arguably faster to use.
☝︎ Further reading: “What Is a Rangefinder Camera and How to Use It Well.”
Zone focusing.
Zone focusing is akin to guessing the distance to your subject and then dialling its value onto your lens. You can use zone focusing on most SLRs, TLRs, and rangefinders by simply ignoring their focus aides and entering your guess instead.
The most obvious example of zone focusing is setting an infinity focus. Everything that looks far to the eye (~100m/300’ away and further) will always be in focus as the depth of field (which shrinks at close focus) is so large at that point that lenses mark those distances as ∞.
Skilled photographers can guess distances accurately while still doing so faster than the TLR, SLR, or rangefinder users. You can learn how to do that from the “How to Zone Focus Quickly and Accurately” guide.
Zone-focusing-only cameras are typically more compact and cheaper than all of the above, though they often make getting accurate focus at close distances and large apertures tricky.
Summary.
This article covers all the basics you’ll need to get started with a manual film camera. There’s a lot, but it will become second nature as you shoot more film and you are free to refer back to this guide. You may just glance at the TL;DR above to get the gist or the summarized picture-taking steps below with links to relevant chapters.
✪ Note: A good way to keep this article handy is to use the “Save to Favourites” button below.
The process of exposing film (taking a photo) with a manual film camera has three main steps:
1) Measuring the brightness of a scene. This can be done with a light meter, or it can be estimated by eye if you’re an experienced photographer. Doing this requires understanding the shutter, apertures, and film sensitivities.
2) Adjusting camera settings for exposure. Your camera settings can alter the quality of your image dramatically; they also ensure that an appropriate amount of light enters the camera.
3) Setting the focus. Manual film cameras have no autofocus but come with various methods that can yield accurate results: SLR, TLR, rangefinder, and zone-focus.
Pressing the shutter button is the obvious (and, sometimes, nuanced) conclusion to this process. Once you’ve repeated that process enough to fill your roll of film, your last job would be to rewind it, take it to the lab or develop at home and scan (or print).
Above: A photo of Wedgmount Lake shot on Kodak Aerochrome colour infrared film with Voigtländer Vitessa A rangefinder. The film was developed at home, scanned using PrimeFilm XAs, inverted and edited in Photoshop, split into three and printed at my local community photo printer (Beau). I used the largest frames Ikea had to frame my prints cheaply, and Hasselblad XPan to take the above meta photo of my printed photos on Kodak Gold 200. It was a lengthy process — but I loved every step of it!