Ultra-Long Exposures With Solarcan
A Long-Term Review of a Readymade Solargraphy Film Camera
9 min read by Dmitri.Published on . Updated on .
I love film photography for its used cameras. Giving them another chance instead of spending resources on having a new one made is an environmentally responsible thing to do.
But despite their abundance, used cameras can not do everything. Some, like the amazing Hasselblad X-Pan, are prohibitively expensive — which is when 3D-printed alternatives make true panoramic photography accessible. And then, there are specialized pinhole cameras made for ultra-long exposures, which can only be bought or made new.
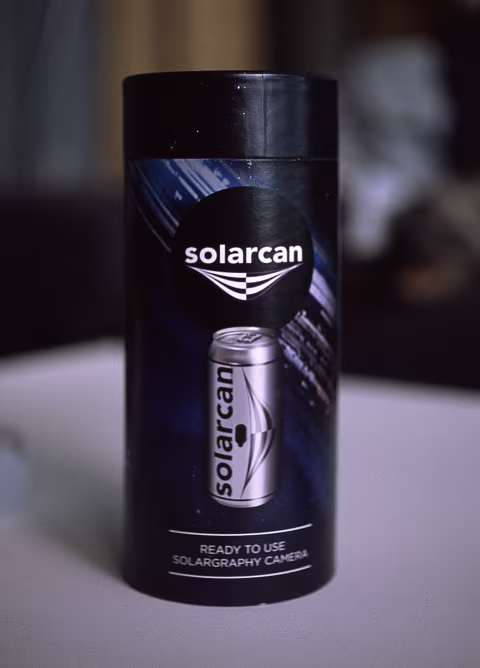
Solarcan is such a camera, designed to take months- or years-long exposures on a rectangle of photosensitive paper through the science of lumen printing.
Solargraphy, a process of making ultra-long exposures featuring the sun’s colourful paths across the sky, is not difficult. Anyone with access to black-and-white photographic paper and enough materials to make a pinhole camera could make their own version of a solargraphic camera. But as someone who has little free time on his hands, I appreciate the ready-made, weather-proof product Solarcan is.
In this article, I will explain how Solarcan works and talk about my experience with it, having left it for five months on my balcony to create a single image.
How does lumen printing work?
Lumen printing is a photographic process that uses photosensitive paper exposed to direct sunlight for prolonged periods of time to form an image.
☝ Further reading: Lumen Lumination: How To Make Lumen Prints With Ilford Gelatin-Silver Photographic Paper.
Lumen prints usually produce colourful silhouettes on paper made for black-and-white prints. Those colours can last some time in subdued light before fading, and they turn monochrome after a fixer bath is applied.
Another interesting property of lumen prints is the variety of colours different monochrome photosensitive papers can create (before fixing). The colours tend to be more pronounced when made with older papers and when wet during exposures — source.
Lumen printing is different from the traditional silver gelatine process that usually takes seconds- or fraction-of-a-second-long exposures combined with a developer to form an image. Lumen prints should not have any contact with developer chemicals, which are required in the traditional process. Adding a developer to your lumen print will render it completely black.
Daniel Berrangé explains his theory of how the chemical processes differ between the lumen and traditional printing methods in his article on the f/138 website. According to him, the intense UV light exposure is responsible for alternate chemical reactions amongst silver halides and numerous other compounds in the paper. A paper by E. Robson on Edinburgh LoFi Group’s website mentions a few more details regarding the process, namely the relationship between the exposure length and the colour sequence: yellow, then sepia, then red-brown, and finally slate-gray.
The slow-changing nature of lumen prints makes them relatively stable, able to withstand subdued light for some time. Unfortunately, they lose all colour after being washed with a fixer — although that lends them an archival quality, same as a traditional print.
So if you’re here looking to see if a solargram/Solarcan photo can be “fixed” — the answer is yes, but you’ll lose the colours.
Solargraphy is lumen printing with a pinhole camera.
Although the first lumen prints date back to the 1830s, solargraphy is a relatively new application of this process. Some of the earliest experiments date back to the 1980s and 1990s, with the first notable group project held in 2000 by Slawomir Decyk, Pawel Kula, and Diego Lopez Calvin.
Since then, solargraphy became popularized by projects like Sam Cornwell’s Solarcan products and even led to scientific interest and possible application by the European Southern Observatory.
The reason for such a late adaptation is likely the modern digital scanning and processing techniques that transform the fading, difficult-to-see images into the colourful positives that solargraphy is known for.
☝ Further reading: “Shot with a Beer Can, This is Likely The Longest Exposure Photo Ever Captured” — PetaPixel.

Solargraphy with Solarcan.
Solarcan makes solargraphy easy. It comes with zip ties that can be used to fix it in place for extended periods of time and detailed instructions. However, some thought should be given to its orientation.
I am lucky to live in an apartment that overlooks the plains of coastal British Columbia, with the mountains clearly visible on the horizon. A dreamy landscape that’s a lot of fun to photograph on 50mm and longer lenses. However, Solarcan’s angle of view is 160° horizontally and 70° vertically, which loosely translates into a 3mm focal length.
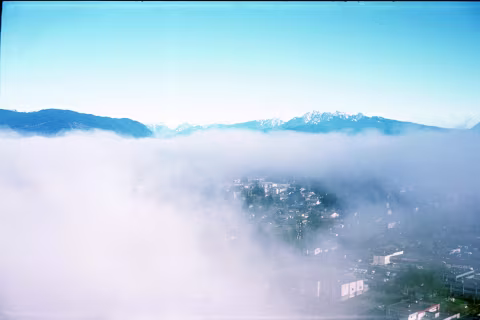
And so, while I enjoy my view immensely, it, unfortunately, does not make for the best solargraph canvas. The reason is that Soarcan’s extreme angle of view makes the mountains you see above too small to see in the resulting image.

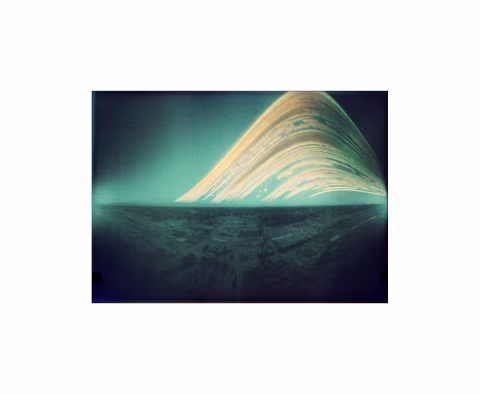
I found that out after waiting for five months for my image. Alas, it turns out that a much better solargraph can be made when taken next to a large tree, a building or a body of water that would reflect the sun’s path.
You should also know that a few details would come out in the resulting solargraph other than the path of the sun across the sky. The moon, car headlamps, and other bright objects simply aren’t producing enough UV light to activate the chemistry.
The good news is that Solarcans are very well made and have no issues withstanding rain, wind and other elements as long as they are properly fixed in place. This is paramount to the project — as the most interesting images require many weeks’ worth of exposures.
Eventually, the time comes to take down the Solarcan, which, in my case, was five months after I mounted it. Extracting the image from the camera is as simple as grabbing a can opener and undoing the top half. This should be done in subdued light — in the shade. Keep in mind that the initial result may disappoint you — it’s brown and barely visible (see the image above). Which is when scanning and colour correcting become the next important instruments of the project.
Scanning and colour-correcting solargraphy negatives.
Since the paper out of the Solarcan is still sensitive to light, there are only a few times that it can be scanned before becoming completely faded. This is why it’s a good idea to take your time and find a good scanner for the job. I wasn’t so patient, having used my printer’s auxiliary scanner. Because it can not do 16-bit scanning (double the colours per channel for higher-quality final images), the result isn’t ideal. There are some JPEG artifacts and a general lack of colour resolution. Nevertheless, the final results still look fascinating.
✪ Note: I use Adobe Photoshop to make all my colour corrections. The link above has a few special offers on Adobe plans and products. Last time I checked, you can get the “photography” package for $10/mo.
Having scanned mine, I’ve stashed the sheet back into a dark corner in case I’d like to fix it later. I then inverted the image and stretched the histogram to limit the output to colours to whatever was made available by the paper. I then played a little more with contrast and colour balance to get the result I felt looked best — remember, these are false colours, so there’s no “correct” way of getting an image.
What you see above is my final solargram of five months in the elements.
A failed experiment.
A solargram requires digitizing to become visible in its full glory. But I was curious: could I change the process to use film as a transfer material — for an all-analogue result?

So I’ve set up an experiment during which I’ve photographed my solargraph on film and scanned the results.
I used my Olympus PEN FV half-frame camera with an 𝒇1.2 lens handheld in subdued light with CineStill 800T. The resulting negative had only faint traces of my solargram, so I scanned it and stretched the histogram to get something a bit more resembling the final result. Unfortunately, it was still too grainy and too faded to show any meaningful results. Additionally, you may notice static discharges (teal-blue “sparks”) that further obstruct the image.

Spending more time on the image did not yield results that were nearly as clear as those after direct scanning of the paper. Lots of grain, a lack of colour variation and virtually non-existent detail. Additionally, my objective of ensuring that the analogue process has priority had failed — I’ve spent even more time on my laptop trying to fix the colours.
I think it may be possible to improve the results by “scanning” the paper with a slower film stock on a larger format camera at a longer exposure time. Whether that’s worth the effort, however, is a different question. Doing this may grant you a “positive” on your roll of negative film, but it will still require extreme contrast adjustments that may or may not yield the results you want.
A case of stolen Solarcans.
Occasionally, I share eBay’s affiliate links on this website that help it earn a bit of income. But I can’t do that with Solarcan:
Last year, Sam shared the story of a shipment being stolen in the midst of the pandemic and supply chain disruptions that ended up on eBay. And earlier, a batch of defective Solarcans was distributed there as well.
So, if you’re looking for one, you’d better buy your Solarcan directly from the website!
❤ By the way: Please consider making your Adobe Photoshop license purchase using this link so that this website may get a small percentage of that sale — at no extra charge for you — thanks!