A Simple Guide to Using Flash on Manual Film Cameras
Achieve Greater Control Over Your Artificially-Lit Photographs
12 min read by Dmitri.Published on . Updated on .
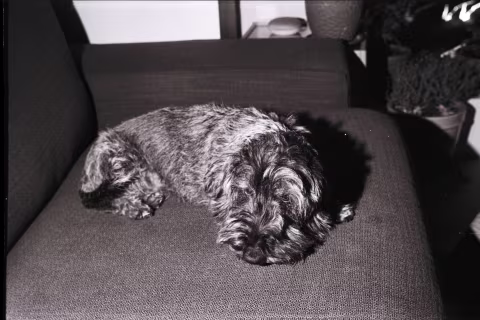
No light meter, no exposure guesstimates — just zone focus, look up your 𝒇-value, and click. Operating external flashguns with no sync at all, like in the photograph above, can be done with any camera that has a Bulb setting and provides control over the aperture. This guide has all the info and a few novel ideas for you to start shooting with flash on your manual film camera in just 10 minutes.
✪ Note: In this guide, I refer to external on-camera flash devices as flashguns; this is what they used to be called, also flashcubes. Today they are referred to as speedlights. Mine are simple plastic black boxes with a bunch of numbers on them and no controls other than power and discharge buttons. This article only covers those features (power and discharge) and a few simple sync scenarios.
Getting a proper exposure of your subject in the dark could be challenging. Flash is a great help, although it too can ruin your perfectly framed shot if it isn’t tamed. Using a manual camera with an external flashgun gives you some additional control and flexibility to produce better images or enable shooting in light conditions previously unsuitable for your vintage camera.
Using external flash, especially with manual exposure cameras, may seem daunting at first, but it isn’t that hard.
In this guide: Setting expectations. When calculating exposure with flash, you may ignore shutter speed. Exposure = aperture~distance. What to do if you can’t find an exposure chart for your flash. Synchronizing flash with the shutter. Mixing light sources. Getting cleaner shots with flash. Buying a flash unit for your camera. Support this blog & get premium features with GOLD memberships!
Setting expectations.
Scenes lit by simple flashguns do not look natural. This is true, regardless of how modern your camera is. The latest devices may have greater control over the light volume and colour temperature, but it’s still quite easy to tell if the image was artificially illuminated.
Flash tends to create strong shadows, stark highlights, and blue tints, which may make the image seem “flat.” When shot in colour, the eyes can appear bloody red.
These artifacts are capable of disappointing photographers. Though uncommon and quirky experiments may stand out nicely in some contexts.
Mindfully choosing your scene, camera settings, and film type can reduce or emphasize those effects.
Of course, there are also hard limits to the effectiveness of a small flash. Typically good enough for a room, it won’t do much beyond a few feet/meters away from the camera. It’s practically impossible to see how the light will interact with the scene, and you are limited by one strong source with no advanced options like controlling the colour temperature, diffusing, etc.
When calculating exposure with flash, you may ignore shutter speed.
☝︎The altered function of a camera shutter is the key concept to understanding flash photography.
A flashgun is capable of flooding the scene with bright light for a very short period of time. Up to about 1/1000th of a second, depending on the device. During this moment, the camera has a chance to properly expose the film. But before and after the spark, it’s darkness — as far as your film is concerned.
Should the photo be taken in low enough light conditions, the flash will functionally replace the shutter.
In pitch-black, the shutter may be left open indefinitely, as the flashgun is to replace its function of exposing film for a short, controlled slice of time with its illumination. Once the light is gone, the darkness provides the same environment as the closed shutter — the absence of light.
Exposure = aperture~distance.
The timing of the flashbulb is consistent, but the amount of light that returns to your camera isn’t. Even though the bulb has constant luminescent power, the number of photons that get reflected depends on the distance from the illumination point (your flash) to your subject.
Just like with a flashlight, things close by are clearly visible, but the stuff that’s far away is dim.
Even though the flashbulb practically replaces the camera’s shutter, we still need to adjust our settings for correct exposure to compensate for lost light due to distance. With the shutter “out of the picture,” the only tool at our disposal is the aperture since the film’s ISO can not be changed mid-roll.
✪ Note: Older cameras and flash devices may mark film speed in DIN and ASA. DIN is rare to find on film canisters today, but ASA is just a different name for ISO. Use this app to convert DIN to ASA.
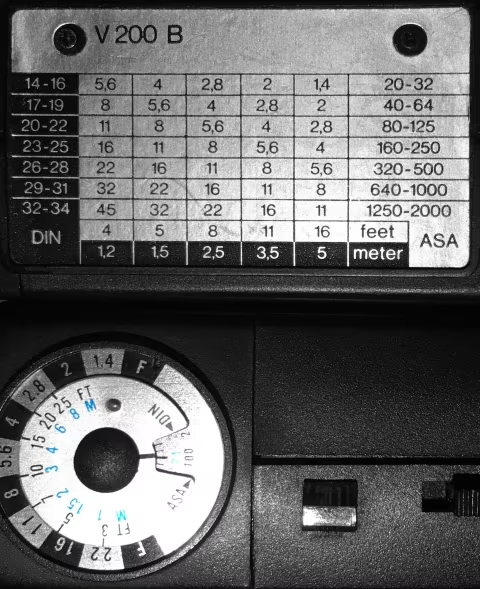
You may use a specialized exposure meter to calculate the aperture value you need but most of the time, it’s not necessary. Flash manufacturers often provide an exposure chart mounted directly on the device. It gives you an aperture value based on the distance between the flashgun and the subject, plus film ISO.
If there’s no chart, please refer to the chapter below on how to make your calculations manually.
All you need to set your camera’s exposure is an estimate of the distance from your flashgun to your subject. Look up the aperture value for that distance and the film speed you’re using. Your shutter speed may remain unchanged.
For added precision, you can focus first and read the meter/ft value off your camera instead of trying to guess it. You may have to eyeball your distance, i.e., zone focus, if it’s too dark for a rangefinder.
Because shooting flash up close will require relatively small aperture values/high 𝒇-numbers, there’s less chance of blurring your subjects.
What to do if you can’t find an exposure chart for your flash.
You can make your own calculations using a guide number (GN), which the flash would either provide or you can look up online by searching its make and model. Here’s how the manufacturers calculate their guide numbers:
GN = aperture ✕ distance (measured with a film speed of ISO 100).