Developing Colour Film as an Absolute Beginner
With CineStill Film Cs41 Powder Developing Kit
23 min read by Dmitri.Published on . Updated on .

In this guide: Why develop colour film at home? C-41, a beginner-friendly process. Tools and chemicals. Working space. Mixing the chemicals. Warming up the developer and the blix solutions. Loading 35mm film into Paterson reels. Loading medium format film into Paterson reels. Processing colour film in C-41 chemicals. Drying, scanning, and archiving developed colour film. Avoid developing your film with expired chemicals. Storing tools and chemicals. Safe disposal. Support this blog & get premium features with GOLD memberships!
Why develop colour film at home?
I’ve been shooting film for over a decade, yet I haven’t had the need to develop at home for much of that time. The labs had always done a great job. Plus, I’ve been living in small apartments, travelling often, and didn’t mind spending money to save time.

Even when I began scanning film to get better results, home development was still neither an objective nor a necessity.
But my monthly trips across town became more challenging after the new puppy arrived, forcing me to spend more time at the apartment.
Though it may sound like I am telling a story of being forced into developing film on my own, that isn’t the case at all. Instead, I like to think of home film development as a privilege with some responsibility, a lot of really cool science, and an avenue for creative expression.
Of course, there are more reasons to develop film at home than saving some travel time. Aside from being able to push- and pull-process easily, developing colour film at home could cost significantly less than it does at a lab. I was able to squeeze enough use out of my kit to average $1 per roll.
You can also develop films at home that many labs won’t accept, such as Kodak Motion Picture film (ECN-2), and your colour development kit will have all the tools for black-and-white film development. But let’s save those techniques for later and focus on the task at hand:
C-41, a beginner-friendly process.
I decided to start with C-41 (colour-negative process) as that’s the kind of film I shoot the most. It’s also the least intimidating process.
The typical advice you may hear is to start with black-and-white film as there’s no temperature control involved — presumably making it easier for beginners. But I’m not sure if that’s true in 2023.
Temperature control is easy with a plastic tub and a sous vide cooker. Sifting through a wealth of non-standardized film development options, various development times, dilutions, and an enormous choice of chemical options (all of which work differently) for black-and-white film can be disorienting. All colour-negative film, regardless of its ISO, has the same development temperature and time.
However, there is an aspect of colour film development that requires some attention — safety. The chemicals used in the C-41 process are corrosive and should be disposed of responsibly. Extra care is needed to avoid spillage and skin exposure. Still, the process is about as dangerous as pouring drain cleaner down a sink or cleaning with bleach (i.e., no hazmat needed).

Tools and chemicals.
Being an absolute beginner when it comes to home film development, I relied on advice from Daren (who blogs at Learn Film Photography). I’ve also gravitated towards CineStill products as they had the least intimidating packaging (a few powder packs looked easy enough, whereas a row of bottles of various sizes got my simple brain confused).
I admit that the shopping list for all the stuff to develop film at home is somewhat long. The entire outfit cost me about $270.
With all the tools and my first batch of chemicals, I developed nine rolls of 35mm/36exp. film, which would otherwise cost me $90 (plus travel expenses) at my local lab. This seemed like overpaying at first, but as I continued to develop at home and learned how to test my chemicals to make sure I extracted their maximum values, I eventually dropped my costs to nearly $1 per roll.
Here are all the tools and materials you’ll need to develop colour-negative film at home:
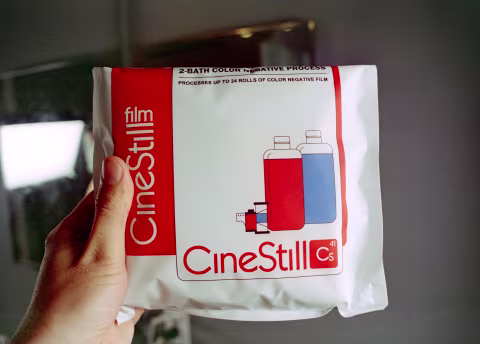
CineStill Film Cs41 Powder Developing Kit for C-41 Color Film. This yields 1L developer and blix, which you can use to develop two rolls of 35mm film at once or a single roll of medium format film. These chemicals come in powder form, which is easy to transport. Alternatively, you can try the Arista C-41 kit, which is all liquid and may be easier to mix (see the review).
Two CineStill Film CS Collapsible Air Reduction Accordion Storage Bottles (1000mL each). I like these bottles because they can be collapsed to take up less space and reduce oxygenation of the blix chemicals, i.e., prolong their shelf life.
CineStill Film °Cs 1000mL Mixing Jug/Pitcher (though any plastic jug with a 1000mL mark should do).
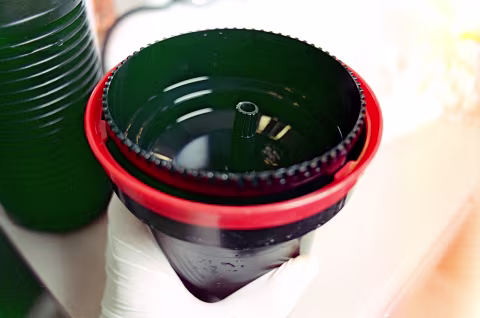
CineStill Film °Cs Temperature Control System TCS-1000. This tool is recommended because of its corrosion-resistant ceramic elements, which make it safe to mix the chemicals directly. Kitchen sous vide can work, too, but it won’t have the convenient temperature control presets.
Paterson Super System 4 Universal Developing Tank and Reels. This kit (pictured above) can develop two rolls of 35mm film at once or a single roll of 120 film.
Large Changing Bag. You’ll need to load film onto your reels and into the Paterson tank in complete darkness. This changing bag makes it possible without having an actual dark room.
Print File 35mm Archival Storage Pages for Negatives. I scan and archive my film at home. Even if you’re planning to send your film away for scanning, it’ll have to be archived safely somewhere — and this is the way.
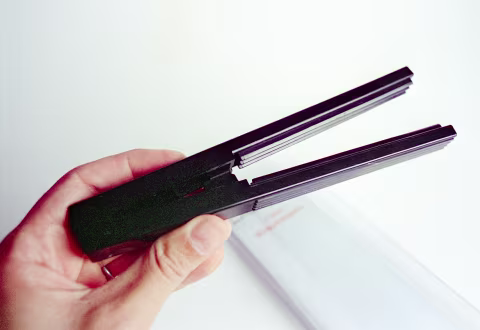
Film Squeegee. This tool is helpful for getting rid of water spots on your negatives.
A wetting agent, like Kodak Photo Flo (when mixed with distilled water), will help you dry your film without streaks or scratches, especially if your tap water is hard. I generally prefer using this instead of the squeegee, although it can still leave some residue on your film.
Film Retriever. This tool lets you extract film leaders from 35mm film canisters, which can then be upcycled. I find it much easier to use this tool than to crack film canisters inside the changing bag. You won’t need this tool if you’re developing 120 film only.
A large plastic tub. I use it to heat water to 38℃ and keep the chemicals at that temperature as they float in their jugs inside that tub.
A kitchen thermometer to verify that the chemicals inside the bottles reached the correct temperature.
Hanging pins to dry the film. You may also 3D-print a simple design that you can use together with your pins to make sure your film stays securely in your pins as you run the squeegee through it.
Masking tape and a marker to clearly label the chemicals.
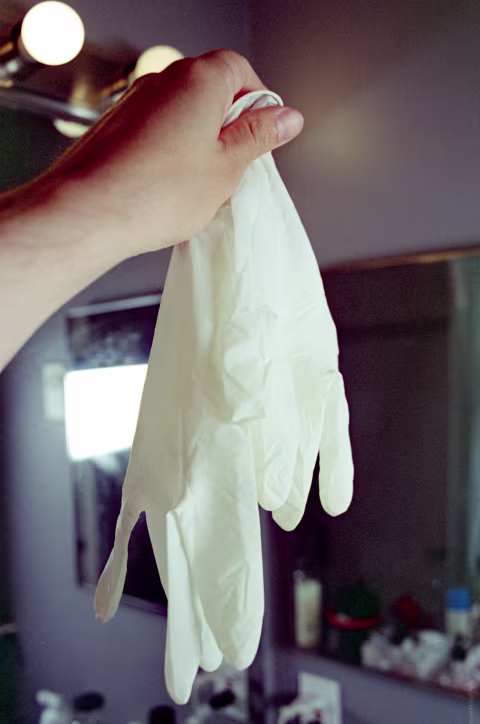
Rubber or latex gloves . Blix can burn your skin, and film developer isn’t particularly healthy to touch either.
That’s it for the shopping list.
Working space.
To develop film at home, you’ll need a sink, running water, a plug for your sous vide/TCS-1000, and some surface to place all your stuff on. It’s also good to have a trash can and a roll of paper towels handy to clean up any spillage. Most bathrooms should do the job (you may want to “book” yours for two hours to make sure you aren’t interrupting anyone’s shower time and ensure you’re able to yield the space when needed).
Before mixing your chemicals, you’ll need a tub of warm water. You’ll need to fill it so that the water level is between the “min” and “max” markings on your TCS-1000. You’ll be using slightly more than 2L of water heated to 38℃/100℉.
Also, hang your clothing pins in advance, ready to hold your film.
Mixing the chemicals.
Colour film chemicals are made to be poured back into storage bottles at the end of a session and used multiple times.
The first step with your new chemicals is to mix them. This needs to be done just once and repeated only when you get new chemicals after the old ones expire. Here’s how to check if your chemicals have expired.
✪ Note 1: A reader has suggested that it’s a good idea to wear a mask while mixing powdered chemicals. You may also want to turn on the exhaust fan if you’re in a bathroom space that has one. You should wear gloves while mixing the chemicals.
Pro Tip 1: Wash your hands while wearing the gloves to get rid of the talc powder that can contaminate your chemicals.
If this is not your first time mixing the chemicals, make sure that you’ve thoroughly rinsed your empty storage bottles beforehand to avoid contamination.
CineStill Cs41 Colour Simplified powder concentrate kit comes in three pouches. They need to be mixed with water into two solutions: the developer, which should last 2-6 weeks*, and the blix mixture, which should last 8-12 weeks*.
✱ — These storage times are approximate as they depend on storage temperature, the number of rolls processed, and contact with air. Collapsible bottles help remove air and may extend storage time. Refer to the guide for testing your chemicals to determine if they’re still good before each development session.
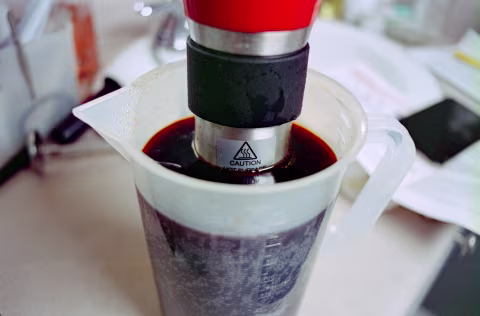
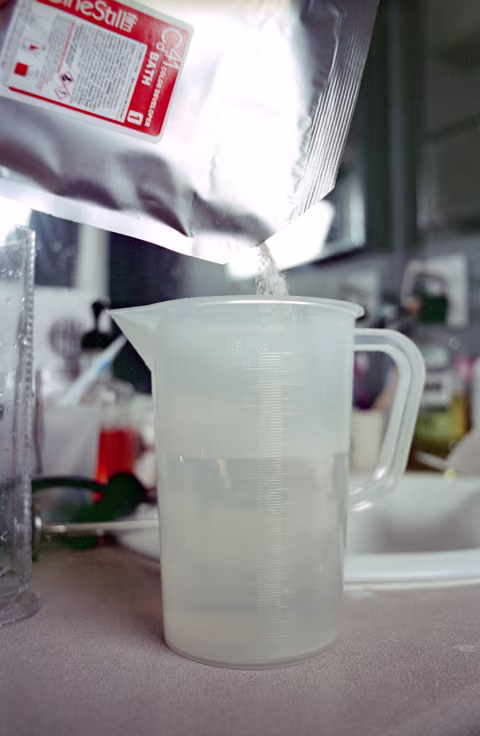
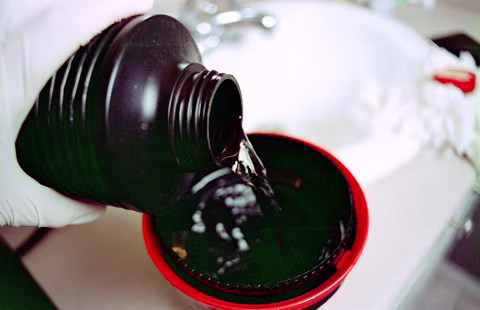
Mixing C-41 developer. Heat 600mL of water to 100℉/38℃ in a plastic pitcher with TCS-1000, then begin adding the colour developer powder while mixing until no crystals or sediments remain.
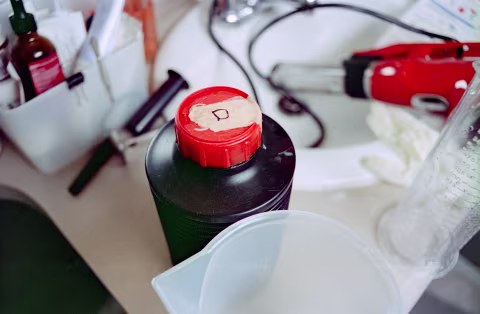
Once everything looks homogenous and the bubbles are gone, stop and place your stop and place your TCS-1000 in a sink. Then, top up the pitcher with warm water to 1L. Then, pour the solution into a storage bottle and clearly label it with a marker and tape. I write “D.”
Rinsing the TCS-1000 and the pitcher. Put your TCS-1000 back into the empty pitcher and fill it with water. Mix the water with TCS-1000 briefly, then pour it out. Repeat this two more times, and then make sure there are no unwashed drops of developer left on the pitcher or TCS-1000.
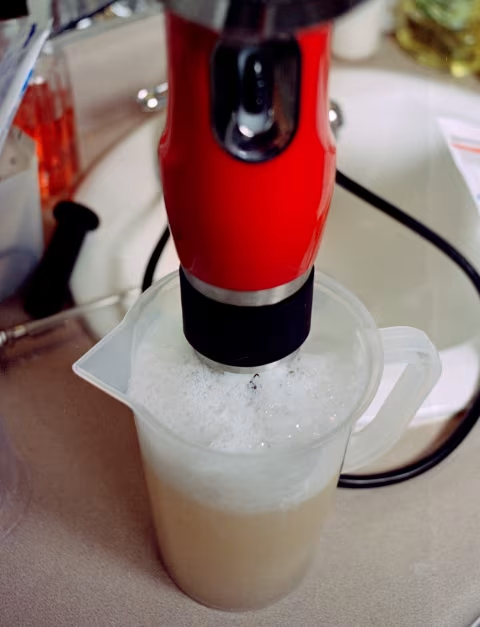
Mixing the blix solution. Heat 600mL of water to 100℉/38℃ in a plastic pitcher with TCS-1000, then begin adding the blix “Part A” powder while mixing until no crystals or sediments remain. Next, add the blix “Part B” as TCS-1000 continues to mix and warm the solution. This creates an endothermic reaction, which heats the bottle slightly and produces some foam/bubbles (which disappear after a couple more minutes of mixing). Once the bubbles are gone, stop and place your TCS-1000 in a sink, then transfer the blix mixture to the storage container and then back to the pitcher. Finally, top up the pitcher with warm water to 1L. Then, pour the solution into a storage bottle and clearly label it with a marker and tape. I used “B.”
Repeat the rinse cycle for TCS-1000.
✪ Note 2: Some C-41 chemical kits come with a stabilizer bath. You can skip it unless you are developing film manufactured prior to the 1990s.
✪ Note 3: If you’re using a kitchen sous vide , you may not want to use it to mix the chemicals directly. Instead, you should have a stirring stick, but take extra care to make sure that the mix is homogeneous for all solutions.
Some kits may have slight differences in temperatures and instructions, but the process is very similar. All kits should come with an instructions sheet.
Wetting agent. If you have a wetting agent for removing grime and streaks from your film, like Kodak Photo Flo, mix it before or during development. It only takes a few drops; Photo Flo specifies one part per 200, which means that a full 2-reel Paterson tank (500ml) will need 2.5ml of the chemical. It’s OK to use approximate measurements, but you should mix your wetting agent in distilled or at least filtered water (whereas the rest of the chemistry is usually OK in tap water).
You are now ready to develop your first roll(s) of film!
Warming up the developer and the blix solutions.
Your developer must be at 102℉/39℃ to process your colour film for the standard three and a half minutes. Since it may take a while to warm up the entire tub of water and the chemicals, I typically begin with this step. Once everything is working, I leave to load the film onto reels as the mixtures warm up.
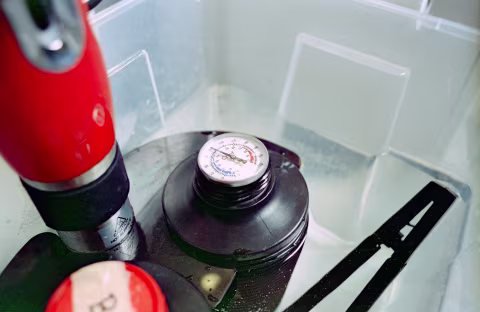
The process of warming the chemicals is fairly simple: mount the bottles in the plastic holder that attaches them to the TCS-1000, fill the tub with water until it covers most of the bottles and set your TCS-1000 to 102℉/39℃.
Your TCS-1000 will beep once it reaches the set temperature; however, your chemicals may still not be ready. (While the water surrounding the bottles is warm enough, the developer may not yet be.) This is why it’s good to double-check the temperature by placing a thermometer inside the developer bottle. Remember to rinse the thermometer after you pull it out of the bottle.
Blix does not need to be at 102℉/39℃ to work properly, so I wouldn’t worry about it as much.
Pro Tip 2: You may want to warm up your bath to 103℉/39.5℃ to account for the loss of heat while you develop the film outside the water bath. This can be especially helpful if your room is chilly.
Pro Tip 3: Put your squeegee in the tub of warm water as it’ll soften it for later (very helpful to avoid scratching the film).
Pro Tip 4: Rinse the tub and the bottles of chemicals to ensure that the water in your tub is free of dust and debris. You’ll use this water to wash your film; thus, it’s a good idea to keep it fairly clean.
Loading 35mm film into Paterson reels.
Loading film into a light-tight Paterson tank makes developing film possible without a darkroom; however, it can be a time-consuming process the first few times you try it.
The method I’ll describe here involves extracting the film leader from the canister and pre-feeding it into the reel. I find this to be the simplest solution as there are fewer fine motions to perform once the film rolls are in a dark bag. Plus, you get an undamaged cassette back, which you can use later to bulk-load your film.
If your camera has a manual film rewinder, you can stop just before the leader goes back into the canister once you feel it being dislodged from the take-up spool catcher. But point-and-shoot cameras, with some exceptions, will wind film all the way. You will need a film leader retriever tool to get it back.
To extract film from a 135 canister, you’ll need to insert the film retriever’s plastic blade into the slot where the film comes out (at this point, the retriever’s blades are all pulled back). Then, you’ll need to rotate the film canister’s core as if you’re winding the film back into the canister until you hear a soft click (I, too, felt that this is counterintuitive). Then, you should push the second blade of your film retriever in and repeat the process. If you feel that pushing the blade in is meeting a lot of resistance, rotate the core for 1-3 more clicks. Repeat the process for the third and final blade. Once done, pull the retriever out in a swift but controlled motion (this motion should feel like you’re tearing a sheet of paper in two). Don’t get discouraged if this doesn’t work on the first few tries. The process will get easier as you do it more often, but it often requires retries.
Watch a short video on how to retrieve film from 35mm canisters.
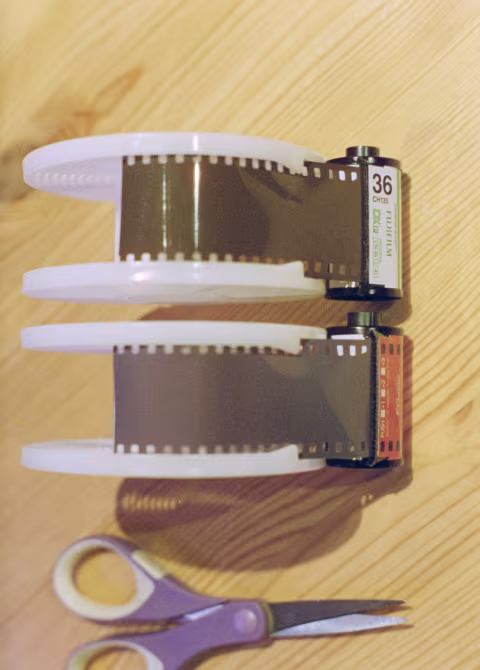
Once you get your leader out, pull about 5” (12cm) of it out and cut it so that it’s flat with slightly rounded edges. Then, feed the leader into the Paterson reel just under the triangular notches and past the metal bearings, like in the photo above. This will make loading the rest of the film into the reels and the tank a lot easier.
Paterson reels are designed to pull the film into their spools automatically as you twist the top and bottom halves back and forth. To get the feel for it, you can try that in daylight, but make sure you don’t pull more film in than the total leader you’ve loaded into your camera in daylight or risk losing some photos. You can also practice with a donor film roll. But for the real deal, pull only a little bit (like in the photo above) before transferring into the dark/changing bag.
Once you’re done with the above, place your reels, your Paterson tank (which should include the funnel/lid and the core for your reels), and small scissors into your dark/changing bag and zip it up.
Now that all your tools and film are inside the dark/changing bag, insert both hands into the sleeves (making sure that they are fairly tight around your forearms). Then, by feel, grab your first reel, gently pull a bit of your film canister away from it so that it frees up some film and begin twisting the reel so that the film feeds into the reel. Don’t worry about leaving fingerprints — it’s best not to touch film, but in general, fingerprints get washed away by the chemicals as the film develops.
Pro tip 5: If you’re loading just one reel with film, make sure that it ends up at the bottom of your Paterson tank and place your second empty reel on top (assuming you’re using a two-reel tank). This will ensure that the chemicals reach all of your film and do not accidentally leave a portion of it in the air.
36exp./35mm may feel a little longer than expected inside the changing bag. To make sure that you’ve loaded everything there’s in the canister, tug on the film canister firmly once you think you’ve reached the end. Measure (by feel) about 1-2 finger’s worth of film away from the canister and snip it with the scissors (careful not to cut your changing bag). Then, twist the remainder of the film into the reel until it begins to rotate with less friction.
Then thread the Paterson tank core through your first reel all the way so that the reel is at the bottom and the extra core sticks out at the top. Repeat the above steps for the second reel, or place an empty reel on top if you’re developing a single roll.
Place the core and the reels into the Paterson tank so that the first (bottom) reel is at the bottom. Then place the funnel/lid on top and twist it clockwise until you hear a click. You can double-check that the funnel/lid is secure by turning your Paterson tank upside-down (while still in the changing bag) — everything should stay in one piece.
Now it’s safe to take the Paterson tank out of the changing bag.
Loading medium format film into Paterson reels.
There are a lot of similarities between 35mm and medium format film loading. However, there are some key differences:
You’ll need to adjust your Paterson reels to fit the film. To do this, twist them counter-clockwise to unlock, then extend and lock by twisting in the opposite direction.
120 film can’t be pre-loaded into the reels, so you’ll need to do everything inside a dark bag. As with 35mm film, you’ll need your tank, tank funnel/lid, reel(s), tank core, and scissors inside the bag.
Start by gently unwinding the film while running your fingers down the strip until you feel the emulsion. You’ll want to separate it from the paper. Optionally, cut small bits of the corners (in the dark) to help advance the film inside the reel(s).
Medium format film is larger and thus more flexible and harder to fit in the reels, so take your time and try not to get too frustrated. It’s OK to take a break.
Processing colour film in C-41 chemicals.
By this point, your chemicals should be warm enough, and your space, ready to develop your film.
Pre-soak your film. Pour warm water from the tub with your chemicals into your Paterson tank and soak your film in warm water for 30 seconds. Then, swish the water around a little and pour it out. Once you pour it out, the liquid may have a blue, green, yellow, or purple colour tint. You can repeat this step, but you don’t need to wash your film until the water comes out completely clear. This step is optional, but it helps prolong the life of your developer.
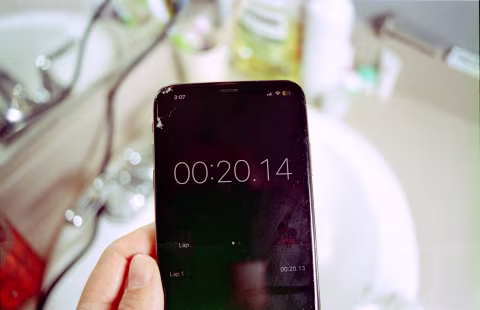
Get your timer ready. I use the basic iPhone timer app.
Pour the warm developer into your empty tank and start the timer right after. You want to have enough chemicals in your tank so that you see the liquid peaking out from outside the funnel hole (it’s OK if it’s a little more, but you don’t want it to be any less to make sure it covers both film reels and you don’t want to fill too much to ensure that you still have enough grip on your stirrer stick).
Then, immediately start agitating your film.
There are many agitation techniques out there, the most common being inversions. However, I found inversions to be unnecessarily laborious, and they come with the risk of spilling your chemicals out of the tank. I use a stirring stick instead, with a few extra motions:
Agitation technique. 1) Tap the tank on the counter once or twice lightly to get rid of the bubbles, then swish it without lifting it off the counter. 2) Twist the stick back and forth four times. Repeat steps 1 & 2 one more time.
Make sure that the stick is actually rotating your reels (you should feel some resistance). Each stick twist should rotate the reels about 180°.
For colour film, you will need to perform the above agitation steps once every 30 seconds.
Pro tip 6: You don’t need to be extremely precise with your timing. If you forget a single agitation cycle, there will be no noticeable issues with your film, as long as you do an overall good job. I typically time my agitations at the X:30 and X:00 marks and do not worry about losing or gaining a few seconds in the developer.
Pro tip 7: If you’re wearing latex gloves, the stick may feel slippery. Rinse your gloved hand and the stick to regain your grip.
Pro tip 8: It’s now safe to turn off your TCS-1000 temperature control as the blix is not as temperature-sensitive as the developer.
The standard development time for C-41 chemicals is 3½ minutes at 39℃/102℉.
Once you notice that enough time has passed, carefully pour the developer back into the bottle. Close the bottle and set it aside. Then, rinse your film with a bit more warm water from the tub, the same way you did during the pre-soak stage. This water soak is optional, but it helps prolong the life of your blix.
Blix. The blix step is identical to the development step, only longer. The CineStill kit I’m using for this article requires eight minutes, while the Arista kit I reviewed later needs six.
Pour the blix back into the bottle. If you’re using a collapsible bottle, ensure there’s as little air left in the bottle before you close it (but not enough to spill anything).
Rinse your film with the remainder of the water from the tub, the same as you did during the pre-soak stage, though you don’t have to wait 30 seconds each time you fill the tank.
If you are using a wetting agent, your last bath should be in that mixture. Pour it in and swirl for ~30 seconds (the agitation technique is not particularly important here).
The wetting agent has a soapy consistency — you’ll need to rinse your tools (but not the film) after you use it.
Finally, pour out the last of the water from your Paterson tank, twist the funnel/lid counter-clockwise and pull the reels from the core.
You can then grab the end bit of the film from one of the rolls and gently pull it out. The film strip is quite long.
Drying, scanning, and archiving developed colour film.
Hang your film on your clothing pins. If you’ve 3D-printed the additional holders, they will help you keep it in place as you run the squeegee through.
Shake the water off your warm, wet squeegee and then run it through your film. Don’t put too much pressure to avoid scratching the film, but make sure that as much water as possible is rung out. Squeegee is optional, especially if you’re already using a wetting agent.
I typically dry my film in the bathroom and then hang it near my scanner for easy access.
See this article about scanning film and this one about archiving and organizing film scans.

Avoid developing your film with expired chemicals.
Colour film chemicals are made to be poured back into storage bottles at the end of a session and used multiple times. However, the developer will exhaust, and the bleach will expire over time.
As your developer exhausts, you will need to keep your film in for longer. Some manufacturers suggest +2% for each additional development session. They may also suggest keeping bleach for no longer than 2 months.
Chem Log is an app that can help you keep a record of your chemicals and calculate extended development time automatically.
Storing tools and chemicals.
You may like to rinse all your tools after you’re done developing your film. They should fit in your tub if it’s big enough. I leave the lid cracked for a few days to make sure everything’s dry before closing the tub completely. It’s good to keep the dust out to ensure it doesn’t end up on your film.
Pro tip 9: If you plan to develop more film immediately after, wipe your Paterson reels with paper towels and swish them through the air so that they’re completely dry. Wet Paterson reels can give you a lot of trouble while loading film.
Safe disposal.
Once your chemicals are exhausted (which you can determine by running a test), you can dispose of your developer by pouring it down the drain. Afterward, wash your storage bottle.
Blix must be disposed of at a suitable facility. Your lab may do that for you for free or for a small fee. If none of the above is available, mix it with kitty litter and put it with landfill trash. Spent blix contains silver, which is toxic to the environment.
Pro tip 10: I hope you found this guide informative and helpful on your film journey! Please consider signing up for the Analog.Cafe GOLD membership, which comes with access to more advanced tutorials and special website features. Thank you.