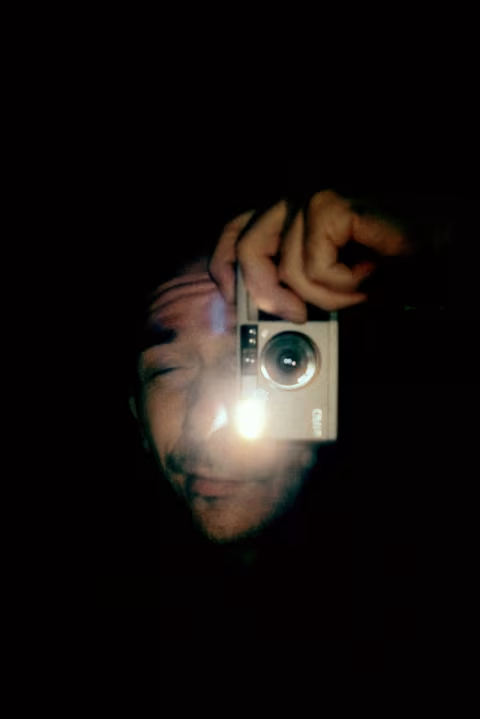
Ricoh GR1/GR1s Film Camera Review
World’s Thinnest Camera — Is It Still Worth the Price in 2026?
28 min read by Dmitri.Published on . Updated on .
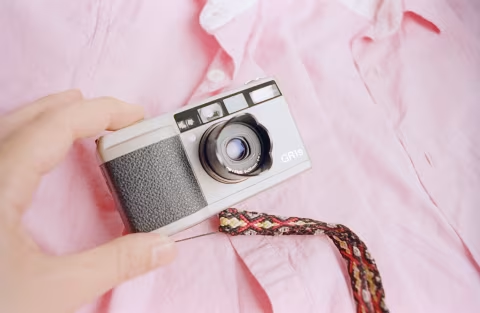
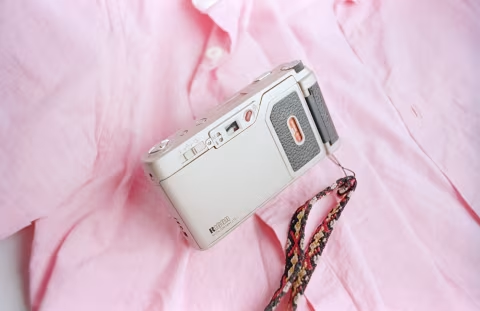
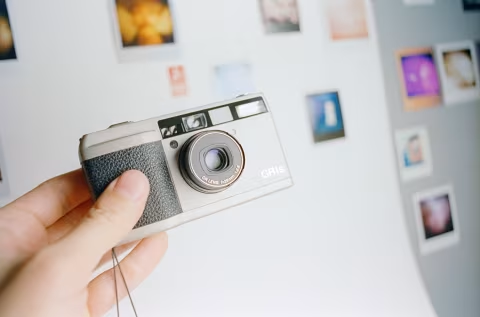
Ricoh GR1s (an upgrade to the first-in-the-sub-series, Ricoh GR1) is a premium film point-and-shoot camera that features a sharp 28mm 𝒇2.8 lens, encased in a light, pocketable magnesium alloy body, and filled with some of the best mid-’90s technological advancements.
These cameras were designed and marketed for consumers seeking premium, uncompromising features and build quality comparable to top-of-the-line gadgets, like those of the famed Contax T-series (while also saving a few hundred dollars).
In this review, I’ll take a deep dive into the Ricoh GR1s’ features, build quality, lens quality, and the realities of buying, using, and owning one. I’ll also quickly compare my copy (the GR1s) to @bigheadtaco’s first model in the series (the GR1) and pin it against the world’s smallest full-frame camera, Minolta TC-1.
Repair. I also discuss common issues (i.e., a faulty shutter button, deteriorating seals, and missing LCD segments) and share my experience in fixing them.
In this review: Ricoh GR1s specs. World’s thinnest camera. Ricoh GR1 vs. Ricoh GR1s. Other Ricoh GR point-and-shoot cameras. Loading film into Ricoh GR cameras. Controls. Autofocus. Flash. Viewfinder. Design and ergonomics. Ricoh GR 28mm 𝒇2.8 lens. Ricoh GR1/GR1s build quality. Issues. Repair and maintenance. Is it worth the price? Where to buy a working Ricoh GR1. Support this blog & get premium features with GOLD memberships!
Ricoh GR1s specs.
Released: 1998. Price at launch $800².
Lens: GR Lens 28mm 𝒇2.8-22 (7 elements in 4 groups) with multi-coating and aspherical lenses. Focus range: 0.35m/1.1’ to infinity.
Focusing: Passive type multi-autofocus or single-point autofocus with focus lock, as well as fixed-focus “Snap” and “Infinity” modes. Automatic auxiliary AF light for low-light conditions.
Viewfinder: Reverse Galilean-type with LCD bright frame illumination in low light. Coverage is 81% vertically and 83% horizontally with a magnification of 0.43x.
Shutter: Electronic leaf-type shutter 2s-1/500s (aperture priority mode can only fire at 1/500s when the aperture is set to 𝒇16).
Exposure: Full auto “Program” or aperture-priority with -2 to +2 EV compensation (half-stops). Film speeds are set via DX-code reader ISO 25-3200, defaulting to ISO 100. Automatic flash for backlit subjects up to 3m/9’10”.
Flash: Guide Number 7 (ISO 100). Charge time is ~5s.
Battery: 3V CR2 (should last about 300 shots, 50% flash).
Chassis: Diecast magnesium alloy. 117mm × 61mm × 26.5mm (4.6” × 2.4” × 1”) — not including grip. 180g/6.2oz.
World’s thinnest camera.
Premium point-and-shoot cameras of the 1990s and the early 2000s were the industry’s examples of the best technology of the day, packed into a pocketable consumer product. The competition to charge buyers over a thousand dollars (in today’s money) for a pocketable camera was fierce.
Minolta TC-1, a titanium-shelled premium point-and-shoot, priced over $1,200 at launch¹, boasted an outstanding lens and is the smallest full-frame camera ever built.
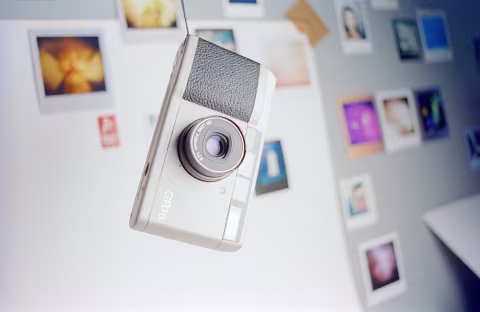
Ricoh GR1- cameras, priced around $800 at launch², didn’t have a titanium body, opting for cheaper but lighter and extremely durable magnesium alloy. They also had an excellent lens and an unusual claim for the “most compact” spot on the podium: the world’s thinnest camera.
Whereas the Minolta TC-1’s shell is smaller than that of any other full-frame camera in any dimension, Ricoh GR’s shell is only as thick as a 35mm canister is wide throughout most of its surface — except the grip area, which houses the cartridge and the battery.
For what it’s worth, the GR is easier to hold, and it makes less of a bulge in a pocket than the world’s smallest camera, TC-1.
Though a 26.5mm-thick gadget isn’t particularly impressive in the year of a 5.5mm iPhone, the fact that the Ricoh GRs are still the thinnest full-frame cameras ever made is remarkable. This includes the modern ultracompact digital full-frame Sony RX1R III, which is 67.9mm thick.
¹ — ¥148,000 in 2006 (likely discounted). Converted and adjusted for inflation in 2025.
² — $379 regular or $399 with Date Imprint for GR1v version in 1998. Adjusted for inflation in 2025.
Ricoh GR1 vs. Ricoh GR1s.
Ricoh GR1 was the first camera in its highly-regarded series of magnesium-chassis’d premium point-and-shoots. All versions of this camera came in either textured grey or black paint, with an optional date imprinting feature.
Unfortunately, the latest year it can print is 2024 (still useful in Day/Hour/Minutes mode — I kept mine turned off).
When I compared my GR1s to Take Kayo’s (@bigheadtaco) GR1, which he bought when it was released, we noticed a few differences. GR1s would show a solid “E” (as I ran out of film), his printed a flashing “0” (a different “out of film” indicator).
GR1s has also added a backlit top-panel LCD that stays on for a few seconds and re-engages whenever its contents are updated via the MODE or time buttons. Conveniently, all Ricoh GR1-series cameras feature finder framelines with backlit illumination. The framelines literally light up whenever you half-press the shutter button in dim light.
While repairing my GR1s’ infamous missing LCD segments, I’ve also noticed that the electronics layout is not the same as on a GR1 — though just as complex and fiddly.
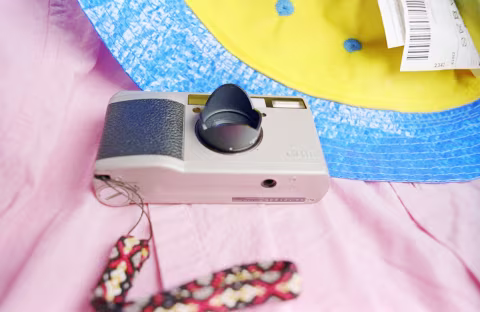
The “s” comes with an optional lens hood, seen in some photos here, which looks very neat yet does not feel completely secure. I even found a service that would permanently convert the Ricogh GR1s hood mount to a 30.5mm thread filter mount (this conversion would require a thicker ring around the lens).
Several sources claimed that the newer Ricoh GR1s added improvements to its lens coatings (for better flare resistance) and the viewfinder, which is supposed to be brighter on the “s.” When I tried both, mine appeared a little brighter; however, the framelines (unless illuminated) are fairly dim on both versions.
Other Ricoh GR point-and-shoot cameras.
The Ricoh GR camera series began in 1994 with the R1, their first claim to the world’s thinnest camera title. The R1 used an aluminum chassis with a plastic film door and shipped with a few compromises (𝒇3.5 max aperture lens, no aperture control, etc.). The R1 was later upgraded to the R1s with improved lens coatings, and the R1e was sold with a 30mm lens.
The GR1 was released in 1996 as a no-compromise upgrade with an ultra-light, ultra-durable magnesium alloy chassis, 𝒇2.8 multicoated lens, aperture control, and many other features appealing to professional photographers.
The GR1s (1998), reviewed here, featured upgrades to the GR1, mentioned above.
The GR10 (1998) used similar internals to the GR1s, but with an aluminum shell and other cutbacks on materials.
The GR21 (2001) featured a 21mm 𝒇3.5 lens with all the features found in the GR1s, with just a little more bulk.
The GR1v (2001) added a way to manually set film ISO, bracketing, refined film transport, and a few other minor features.
Ricoh still makes GR-branded digital cameras today, the first of which was the Ricoh GR Digital (2005). The current model is the Ricoh GR IV ($1,500 in 2025), with an APS-C (approx. half-frame) sensor.
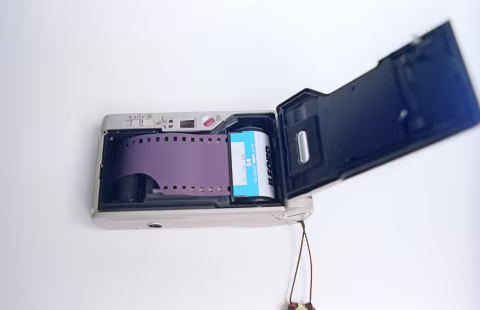
Loading film into Ricoh GR cameras.
Ricoh GR cameras share a similar automatic film-loading sequence as Hasselblad XPan and Fujifilm Cardia Tiara (DL Mini): as soon as you place the film inside the camera and close the film door, a motor spins up and unwinds the entire roll into the camera.
This extra step was implemented in several premium film cameras with motorized film transport for safety and discretion:
Because the film is advanced back into the canister with each new shot, accidentally opening the film back would not burn the exposed frames (as they are already safely wound into the canister).
Point-and-shoot cameras that automatically rewind film after the last shot can be very noisy, and the process could take a minute to complete (potentially during an important social moment). Ricoh GR film cameras finish winding the film very quickly, as most of it would have already been inside the canister.
Controls.
The appeal of the Ricoh GR1s isn’t limited to the compactness or even the quality of its lens.
In the 1990s, microscopic electronic components had already taken over the world of film cameras, making shutter and aperture control cheaper and easier to manufacture without physical controls. Compared to the laborious task of assembling a mechanical timing mechanism, new cameras only had to print and mount a PCB, which would take over the timing and exposure computing, with the moving parts limited to just film transport. The effort Ricoh exerted in designing control circuits, logic, and rugged physical controls made their electronic cameras more expensive than the pure point-and-shoots — which paid off in popular acclaim and seven years of continuous production.
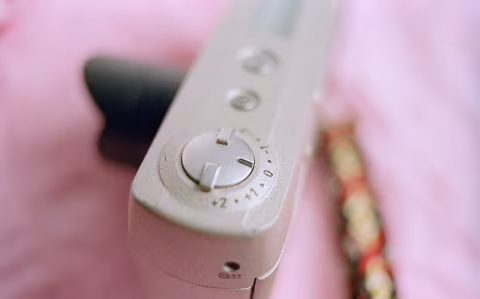
The first of the “extra” controls on the Ricoh point-and-shoot is the exposure compensation dial (see above). On GR1s, it goes from +2 to -2 in half-stops. Very convenient for deliberate overexposures, pushing, and pulling film. You can also use this control to compensate your backlit scenes; however, if your flash is turned on or set on auto “A,” the camera will automatically illuminate your scene to ensure an even exposure.
The aperture/Program mode selector dial (see below) on GR1s lets you control the lens apertures in half-stops from 𝒇2.8 to 𝒇22. The Program mode sets the camera to automatically calculate all of its exposure settings. (Note that the top shutter speed on GR1s is 1/250, unless you set your aperture on 𝒇16-22).
In practice, I found that if I’m not careful about those dials, I could forget that the camera is set to 𝒇2.8 in full sun or that the exposure compensation dial is not where I intended it to be. That is mostly on me; still, the viewfinder only shows a static, and fairly dim icon for a set exposure compensation or a small “P” when the aperture is not set — both of which are easy to miss.
The aperture selector dial on the GR1s was helpful whenever I wanted to control background separation; however, the half-stops aren’t practical, and, for the most part, I kept my camera in the Program mode.
While not especially useful on the daily, the aperture selector dial can become essential for long exposures and astrophotography. The shutter on the GR1s could be set to Bulb by pressing the timer button next to MODE on the top panel twice (this will show a “T” on the LCD display). You can then set your manual aperture and exposure time when you press the shutter. The camera will start counting down the seconds up to 60, but continue to stay open indefinitely until you press the shutter button again or turn off the camera. You can turn off the Bulb mode by cycling the timer button.
The timer (when not in the “T” mode) will delay the shutter release by 10 seconds.
Of course, the Ricoh GR1s has a standard tripod hole!
![Ricoh GR1s with the single-point autofocus mode [ · ] enabled.](https://res.cloudinary.com/analog-cafe/image/upload/c_fill,fl_progressive,w_480/image-froth_1531980_zmm0KnVti.avif)
Autofocus.
Ricoh GR1s activates its autofocus motor as soon as you half-press the shutter button. Registering focus typically takes less than a second, but you can speed that process up further by setting the camera to SNAP via the MODE button.
In the SNAP mode, the shutter fires immediately when you press the shutter button, as the distance is pre-set at two metres (six feet). To understand how this works, see hyperfocal focusing.
You can also program the SNAP mode distance/set focus lock. To do this, cycle the MODE button until you see a dot inside a small box [ · ] (see above) — this is a single-point autofocus mode. Next, half-press the shutter button to focus on any object and hold the MODE button for about one second. Lastly, look at the top-panel LCD to confirm that the *SNAP* is flashing: this means that the GR1s’ focus is locked to the distance you’ve set. Pressing the MODE or turning the camera ON/OFF will disable the focus lock.
The single-point autofocus mode is the most straightforward way to focus with the Ricoh GR1 cameras. It will ensure that whatever’s in the small square in the middle of the viewfinder is in focus. If the system could not acquire focus (if it’s too close or if there are reflective surfaces in the way), the square will blink.
Conveniently, set focus distances are indicated in the viewfinder as a flower (close), a person (portrait distance), two people (medium distance), and mountains (far distance). This is very helpful; for example, if you’re focusing on something close and seeing a mountain icon in the finder, you know that you’ll need to refocus, whereas an icon that matches the distance provides reassurance.
The multi-point autofocus mode is the default on the Ricoh GR1s. When enabled, you’ll see two square brackets in the middle of your finder, [ ], which will sometimes turn into a square in the centre (like in single-point autofocus) and other times you’ll see either the left [ or the right ] bracket during the shutter-button half-press.
An easy way to understand the multi-point autofocus on a Ricoh GR1 is to think of it as three points (each of the square brackets plus the middle square). Once you point your camera at something and half-press the shutter button, it will evaluate the area inside the square brackets and select a portion of it that’s closest to the camera. A left bracket would indicate that something on the left side of the area is closer to the camera and thus will be in focus, vice versa for the right bracket. A middle square indicates that either the middle part of the area is closest or that the entire area inside the square brackets is about the same distance from the lens.
The infinity focus mode, activated by cycling with the MODE button, is indicated with a mountain icon in the LCD. It locks your lens to infinity, which can be helpful for landscape photography, especially if you want to photograph something in the sky or on the water (which can trip up autofocus).
Lastly, holding the shutter button in the half-pressed position not only locks the focus but also the exposure. This can be helpful if you’d like to focus on and expose for a portrait, but you’d also like your subject’s face to be off-center: simply focus on them, half-press the shutter button (and hold), recompose, and fully depress the shutter. Your result will be a photo with the focus and exposure set on the subject who isn’t in the middle of the frame.
Neither the manual nor any resources state how the GRs meter. If I were to guess, it would be a mix of average and spot (which is how it may decide to fire flash in backlit situations).
Flash.
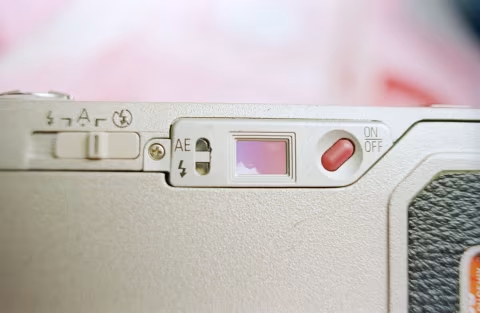
Ricoh GR1s makes controlling flash easy with a convenient switch next to the finder window. You can force it to fire with each shot, allow the camera to determine an appropriate time (when set to “A” for auto), or disable it.
You can also set the flash to red eye reduction mode by pressing and holding the timer and the mode button at the same time for about a second. This will fire a short burst of flashes before activating the shutter (you can disable this mode the same way it’s turned on).
If you set your aperture and fire a flash in a dimly-lit area, the GR will drag the shutter. Essentially, the camera will slow the shutter down to get the rest of the scene exposed, along with the parts that received flash. This, however, can cause motion blur if you aren’t using a tripod.
The flash Guide Number on Ricoh GR1s is 7 (ISO 100), which means it’s effective up to 2.5m/8’ with an ISO 100 film or up to 5m/16’ with an ISO 400 film.
Viewfinder.
The viewfinder on the Ricogh GR1s is reasonably bright but fairly small. I can use it with the glasses on, but it feels most comfortable with contacts.
The icons and lines in the viewfinder can be very hard to see at times, yet they get surprisingly bright in dim light as the camera uses a backlight function to illuminate them when you half-press the shutter button. I wish they did that in all light conditions.
The remarkable thing about the frame lines and indicators is that they are part of an internal LCD assembly and are dynamic. The parallax correction marks will automatically switch depending on your distance, the shutter speeds will be shown on the left, and a few other icons will guide your usage in real-time.
The viewfinder is a reverse Galilean-type, which means that the marks aren’t just lines but are projections from a second (frosted) window, making them brighter than the rest of the frame. This type of finder is uncommon on point-and-shoots, usually reserved for high-end rangefinders.
Design and ergonomics.
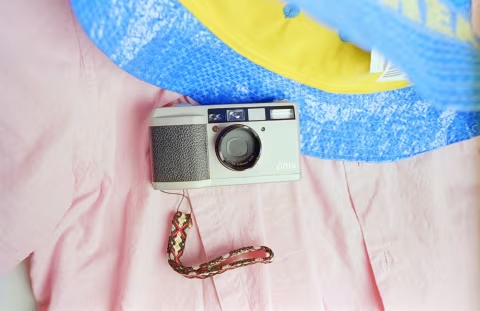
The Ricoh GR1s is one of the easiest cameras to travel with, thanks to its remarkably slim body; it’s also very easy to use, as the bulging grip on the side makes it comfortable to hold and operate with just one hand without strain.
Though the GR1 isn’t contoured like the Olympus Mju II (which is a treat to hold), it’s a lot more secure in hand than the tiny Minolta TC-1. It also fits into a jean pocket better than all of the above.
Unfortunately, this camera is not weather sealed (for that, have another look at the Mju II or the Yashica T5), but it makes up for that with a very durable magnesium alloy body — whereas both the Mju II and the T5 feature plastic shells.
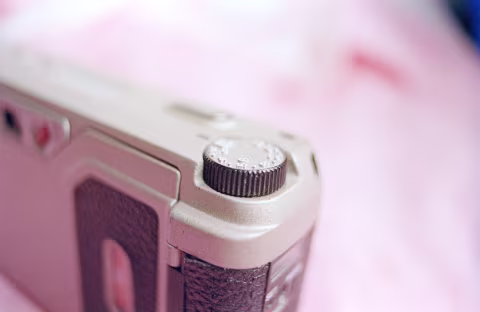
The shutter button is well-balanced, which makes single-handed low-shutter-speed shots possible.
However, I wish that the aperture and exposure compensation setting readouts were a little more refined. There’s no way to know what’s going on on the top panel without taking the eye off the finder.
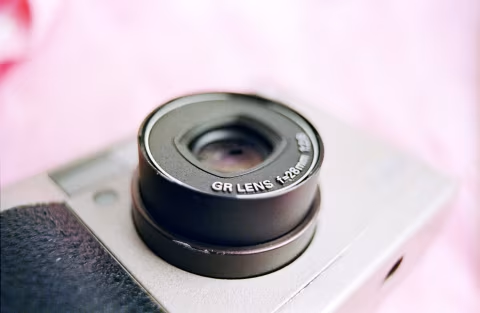
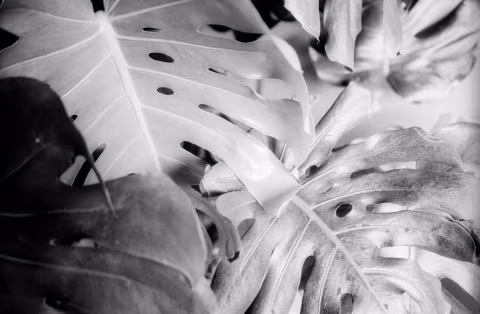
Ricoh GR 28mm 𝒇2.8 lens.
Ricoh GR lenses were highly regarded for their coatings (which appear to have improved with each iteration of the GR series) and advanced corrections with multiple aspherical elements. A limited number of these lenses were even made available for the M39 mount (if you find one today, it may cost more than the camera).
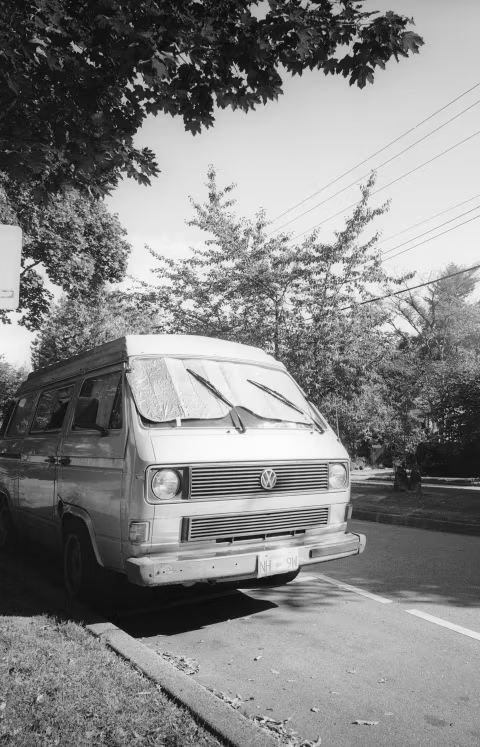
Indeed, these lenses are unlikely to flare. Even in the worst possible case (e.g., when the sun is just outside the frame and the camera is without its hood). And if the flares appear, they are faint and aren’t particularly distracting.
Despite its strong anti-flare properties, the lens on the Ricoh GR1s renders photos in medium contrast, though fairly consistently across various types of lighting.
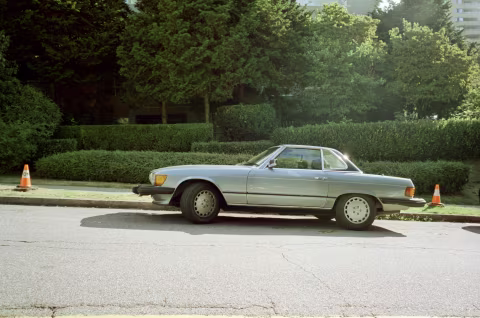
In addition to having a well-balanced contrast control, the GR lens is sharp, especially when stopped down, which this camera tends to do fairly aggressively in the full-auto (Program) mode.
If you find that your photos aren’t coming out sharp, most likely the culprit is autofocus, which can sometimes catch the wrong part of the scene if you aren’t careful, or a slow shutter speed that introduces motion blur. Being a point-and-shoot, GR1s can work very fast, but if you want perfectly-focused images, it’s best to double-check the shutter speed (aim for 60 and above) and the set focus distance in the viewfinder.
Of course, it doesn’t hurt to set your aperture to 𝒇5.6 or 𝒇8, which tend to be the sharpest apertures on most 35mm film cameras.
I’ve added a touch of contrast to the photos above and below to give them a little more punch and highlight this lens’ ability to capture fine details. The inversions (pre-edit) were made with film Q.
The GR lens is very good at correcting chromatic aberrations, and it also seems to keep the lines straight up until the closest focus distances.

The nice thing about being able to control the aperture manually is the ability to set the Ricoh GR cameras to 𝒇2.8 and soften up those harsh shadows that the flash may drop in your photos. Having a medium-contrast lens also plays well with indoor/flash photography, even in mixed light.

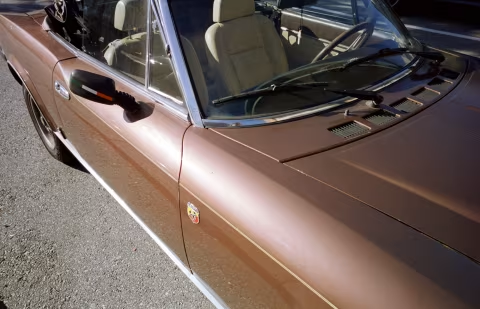
Ricoh GR1s’ tendency to select small apertures in bright conditions curbs the bokeh/lens blur effects, and instead, it adds occasional yet very noticeable starburst effects.
For example, the photo below was shot in daylight at ISO 100, yet it is entirely in focus, suggesting that the camera chose something close to 𝒇16. Note the starburst effect on the license plate.
With the flash set to auto, it will fire if the camera detects that your subject is backlit. This can render even less contrast in your pictures.

Even at its widest aperture, 𝒇2.8, the GR lens will have the majority of the scene in focus, thanks to its short focal length. But it’s a high-resolution glass, and I’ve scanned the results from it on a high-resolution scanner, so I was able to note a few soft spots where the focus was partially off.
Take your time with this camera if you’d like to nail your focus and exposures on each frame (it’s possible).

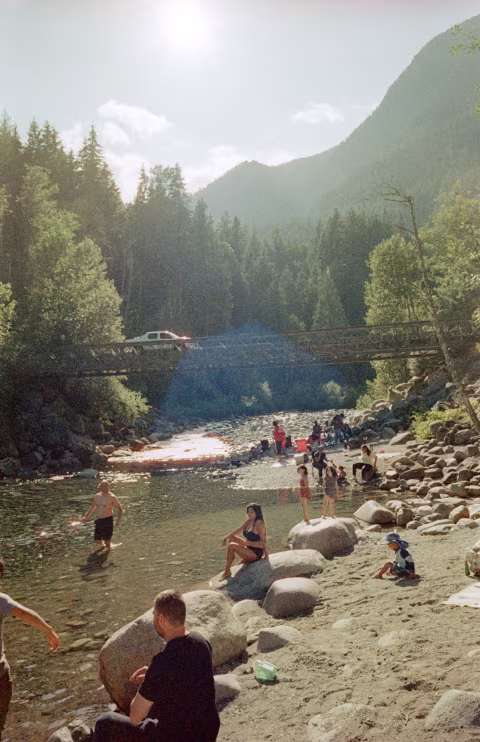
Whether the focus is spot on or slightly off, the resolution of the GR lens (combined with a fine-grained stock, like the Kodak Vision 3 50D) makes those distinctions easier to notice. Yet from a normal viewing distance, even imperfect shots can show clarity and dimensionality. (e.g, the focus in the photo above is set on the asphalt behind the bikers).
Even with the relatively wide 28mm focal length and a fairly small maximum aperture of 𝒇2.8, it’s still possible to get good background separation and bokeh with the Ricoh GR lens. Getting close to the subject and setting the aperture to its widest can do the trick (just watch the shutter speed in the finder and ensure it doesn’t show a blinking 500 or 30).

Ricoh GR1s can focus as close as 0.35m/1.1’ — getting this close with a wide-open aperture will decrease the depth of field significantly and add a smooth, slightly undercorrected background blur.
Fairly large bokeh balls are possible thanks to the fact that this is still a full-frame camera.
Personally, I prefer the bokeh from my Voigtländer and Zeiss lenses made in the 1960s for their swirly imperfections and “liquid” qualities — but the cameras that wield these are much heavier and aren’t nearly as convenient as the GR1s.

Having put over a dozen rolls through this camera, I’ve realized that the GR lens has a lot of potential, yet it needs some practice to be fully understood and taken advantage of.
Ricoh GR1/GR1s build quality.
A decade before film photography got completely overtaken by digital cameras, it was in its prime. It was in the 1990s that advanced materials, like titanium and magnesium alloys, became available for civilian use. Microscopic electronic components were printed en masse, cheaply. Supercomputers helped calculate new lens formulas, and centuries of mechanical engineering made the unlikeliest feats of construction possible on an enormous scale.
The Ricoh GR series was a part of that cohort.
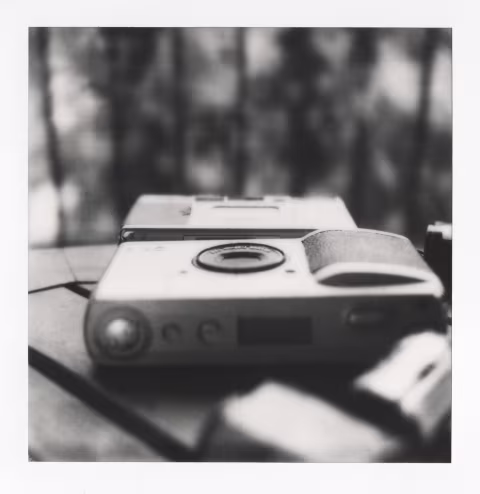
This camera has tight tolerances, showing no uneven gaps and a perfectly sculpted shell. All the controls are sturdy and reliable. The buttons are small yet still easy to press. A truly impressive result of high-end engineering that is unlikely to ever be replicated again (last year, Ricoh built a half-frame film camera, Pentax 17, that’s larger, heavier, has fewer automation features, no autofocus, yet costs just as much as a GR).
Ricoh engineers cut no corners on the GR1 cameras. Everything that could be made of metal without adding excessive weight is. The dials rotate with solid, satisfying clicks. The surfaces feel grippy, the shutter button is perfectly balanced, the date function doesn’t need a separate battery and is neatly tucked on the side, and even the viewfinder lenses use coatings to prevent stray light.
Issues.
Alas, the GR cameras were made nearly thirty years ago, which is enough time to reveal a few issues. The most common one is the missing segments in the LCD (discussed further below).
Another issue is a split plastic viewfinder panel that holds the power button. It’s held by a single screw that can be easily overtorqued during the repair assembly — a common problem for cameras that are hastily repaired (this can cause the power button to fall out and make the camera unusable).
Dead motors are likely fatal for these cameras. Grinding gears and excessively loud noises are the sad signs of a dying gadget. The mechanical components in the GR are so fine and intricate that they may not be possible to fix today, even with a donor camera.
Lastly, like the vast majority of other film cameras, the GR uses foam to prevent stray light from entering the film compartment. Thirty years have proven to be more than enough time to turn it to dust. Thankfully, this is a repair that anyone can do at home.
✪ Note: Ricoh GRs are small cameras; you’ll need a steady hand and patience to replace their foam light seals.
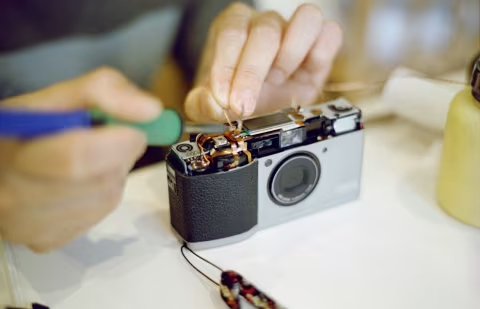
Repair and maintenance.
Ricoh GR1s is a complex machine made of many small electronic components that can break easily. Still, there are some things you can do at home, like changing the light seals.
Light seals. Changing light seals on Ricoh GR1s is not much different from any other camera, other than you’ll need to be extra careful, as it’s very small. How to change light seals.
Film not loading. The camera relies on the pressure plate to help catch the film leader. If you find that it takes several tries to load your film (even if you insert it correctly), and that a bit of a squeeze on the film door helps to get it through, you may have weak springs in your pressure plate. To fix it, carefully take off the pressure plate and pull the springs away from it gently. Please note that you may be risking breaking things here, so please proceed with care and at your own risk.
☝︎ Further reading: “Home Film Camera Maintenance and Basic Repair Guide.”
✪ Note: Below, I’m sharing some general advice about proceeding with more complex repairs, which involve opening up the camera. I recommend having prior experience fixing basic electronics, good soldering skills and a fine-tipped adjustable temperature soldering iron that you know how to use well.
Accessing the electronic components. Please follow this iFixit guide for help finding the hidden screws to remove the top panel.
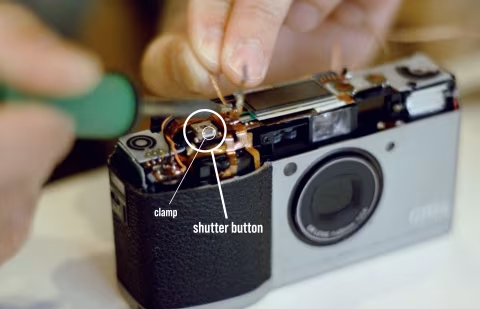
Shutter button. My copy’s shutter button worked some of the time but misfired occasionally. To fix, I disassembled the shutter button box (circled above) by gently disengaging the clamps. I then carefully cleaned the oxidation of the contacts with a metal wire and reassembled the button box. This is a job for fine tweezers, and you may want some reference photos.
LCD. Ricoh stopped repairing their GR film cameras in 2014; yet, you may still find spare LCD and flex cables today.
Unfortunately, the above iFixit guide was not helpful in diagnosing the flex cable, LCD, or actually fixing the issue. A friend who worked on aviation electronics helped me explore the contacts with his fine soldering iron and cleaned the power supply contacts connected to the display. That was enough to fix my copy.
Is it worth the price?
Ricoh GR1s is one of the greats. There are many thousands of film cameras out there for all needs and wants, but only a few were made with quality, high-performance materials, microelectronics, advanced mechanics, and top-tier optics.
Ricoh GR1s are currently selling for $500-$900, as of September 2025. GR1v is around $1,000, GR21 is $1,500-$2,000, and the original GR1 is around $450+.
Reliability and repairability would be my main concerns when considering a camera like the GR1s.
A premium point-and-shoot is great for casual photography, but I would always bring a backup (ideally mechanical) if it’s an important event.
Repairing point-and-shoot cameras is difficult; finding a reputable technician is also hard. The good news is that the GR series still has some spare components available online, and some repairs can be done at home (this can not be said for most other cameras in this category).
Despite being the slimmest camera in the world, with high-quality components and design, the GR1s is cheaper than most premium point-and-shoots, like the Minolta TC-1, Contax T3, Leica Minilux, etc. I suspect that the main reason is the materials: instead of a very expensive titanium shell, Ricoh opted for a practical, ultralight, durable alloy.
The GR1s compares favourably against other premium point-and-shoot cameras in terms of price and repairability. Unfortunately, it remains a relatively high-priced item with a risk of malfunction within the first year.
If you can afford one, consider that the price of these cameras has been rising steadily over the past ten years and is unlikely to go down (i.e., now is the best time to buy).
To save money, avoid obvious lemons, and generally make safer vintage camera purchases, check out “The Vintage Film Camera Buying Guide.”
Where to buy a working Ricoh GR1.
These cameras aren’t particularly rare in 2024 and are fairly easy to find online. As usual, examine all photos, the description, and your seller’s ratings.
❤ By the way: Please consider making your Ricoh GR1/GR1s/GR1v camera purchase using this link so that this website may get a small percentage of that sale — at no extra charge for you — thanks!