Harman Phoenix Reversal Explored
A Follow-Up
10 min read by Phoenix Hawthorne.Published on .

This article is meant to be an extension of the work done previously by Dmitri (which can be found here).
After reading up on his processes, I realized that there may be room for improvement, or at least experimentation. Over the course of five test strips from two rolls from the same batch, I think I’ve found something that works well for both scanning and projection.
I am hazardously calling my results good, though I recognize there is still room for further improvement.
My current scanning setup is a bit lacklustre, but the scans I’ve made clearly show the outcomes of my current process and experimentation.
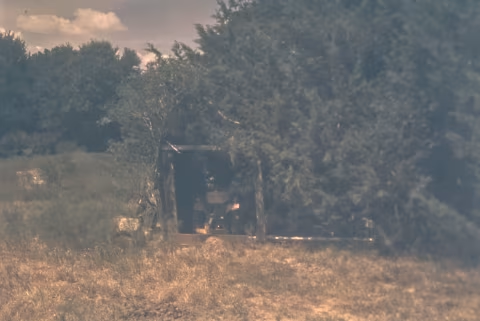
Process A: Natural-looking colours, dense shadows, and a clear base.
Exposure: EI 100.
Presoak: No.
First Developer: Rodinal 1+100 27℃/82℉, semi-stand developed for one and a half hours with 15-second agitations every 30 minutes.
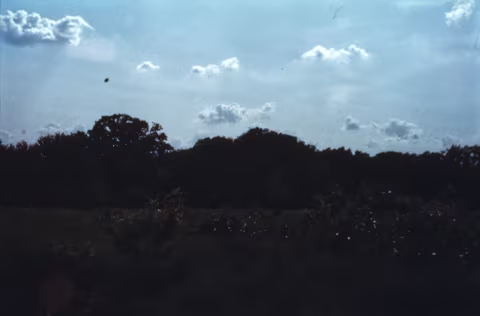
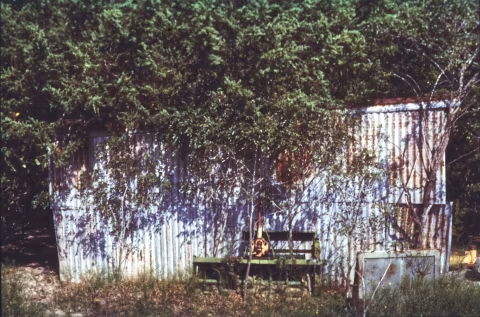
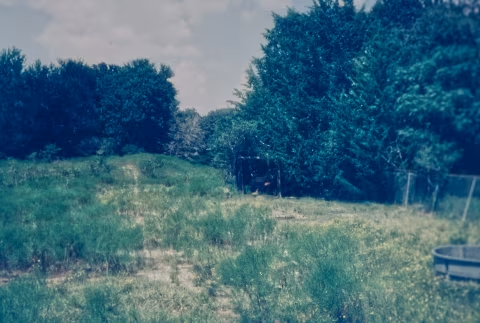
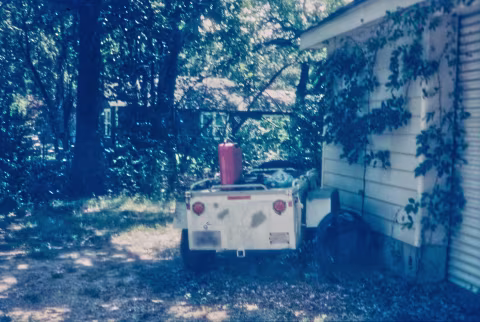
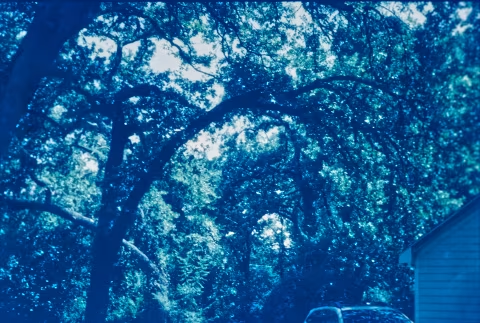
For some context, these photos were all taken in the middle of a Texas summer while visiting my parents. Even with clouds, it was incredibly bright, and while we do have some greenery, they don’t tend to be the most vivid greens.
The most striking things I found when I pulled this film out of the tank for the final time were that the base was very clear, and the colour renderings all seemed very accurate to life. In this image, I accidentally metered for the sky when I meant to meter for the trees. However, I quite like this result, with its strikingly blue sky and sharp clouds. While the shadows did get crushed, one of the benefits of the semi-stand development was that it helped smooth out the exposure mistakes I made.
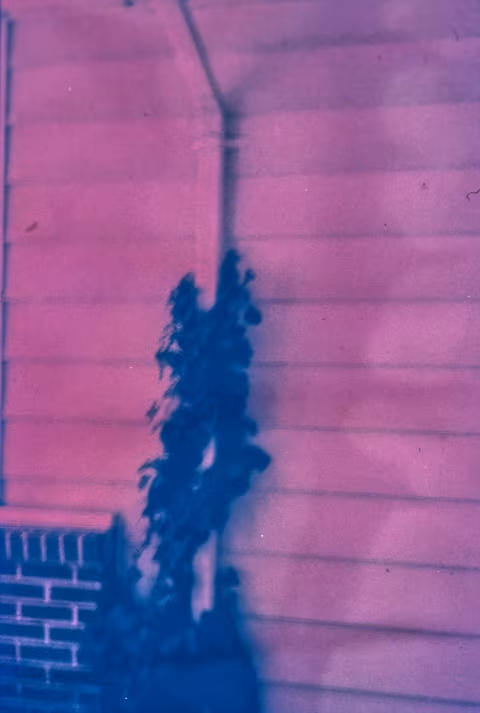
Another benefit I found of the long original development time was the base. In Dmitri’s original processes, the base would often come out blue, and indeed, I ran into this issue with my earlier attempts. But, if anything, the base here has a very slight amber tint. This tint is very easily edited out and is not noticeable during projection.
However, I feel that this tint is better than a heavy blue cast, especially as it fixed the other issue Dmitri had: reticulation. Both in the scans and visual inspection of the film, there was no evidence of reticulation.
This is because the concentration of Rodinal and the temperatures are much less extreme in this process. The trade-off was, of course, that it takes considerably longer.
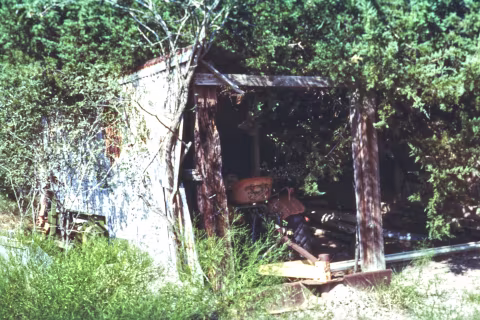
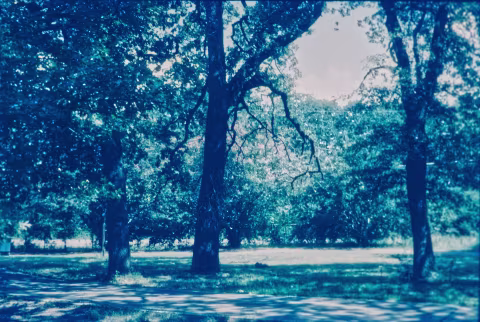
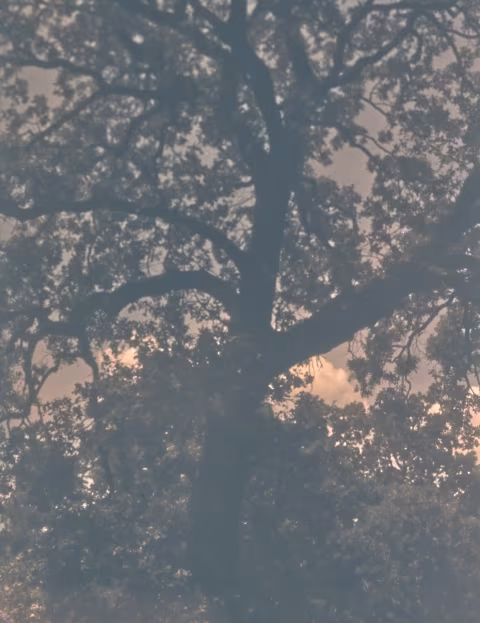
This image shows the colour vibrance I’ve gotten through this means of development. Insofar as editing goes, the only things that I’ve done to this image are cropping and sharpening. Really, the only reason that I felt the need to sharpen was because I was getting more pixels than grain. These edits hold true for the rest of the images presented here.
So far, this has been my best result, and it will be the process I use until someone comes up with something better.
Process B: Blue cast, slightly thin in scanning, but perfect for projection.
Exposure: EI 100.
Presoak: No.
First Developer: Rodinal 1+7 27℃/82℉ for 6 minutes with 10-second agitations every 30 seconds.
Filter: Cokin 030.
This was the second process I tried after Dmitri’s Result A. I thought that since the blue mask was relatively light that it may be corrected with a filter. I went through my collection and settled on this and the Cokin 002 filter. Though this didn’t entirely fix the cast, the 002 filter obliterated colour rendering.
Although this process is much quicker, it has major drawbacks:
This process requires a filter. This filter is equivalent to an 85B, which is a readily available and cheap, but it is an extra bit of kit nonetheless. The other issue is that the blue mask is quite prevalent.
Perhaps another issue with this process is that the films come out a bit thin, which could likely be fixed by shortening the original bath in Rodinal to 5.5 minutes. However, this thinness is excellent for projection, if you’re willing to sacrifice a bit of saturation.
If speed is the concern, then this process is probably the best option in this article, but Dmitri’s Result A may still be better. However, in projection, this set of positives would probably benefit from a light amber gel, perhaps a Roscoe 02. Outside of the blue cast, I actually quite like the look of these slides.
Process C: Blue cast, slightly thin in scanning, but perfect for projection.
Exposure: EI 100.
Presoak: No.
First Developer: Rodinal 1+7 27℃/82℉ for 6 minutes with 10-second agitations every 30 seconds.
This was my first attempt at my own process. My original intent was to address the one issue I knew how to fix from Dmitri’s process: reticulation.
Personally, I find developing one of the most interesting and engaging parts of analogue photography. I think that the interaction between light and chemicals is fascinating. Originally, this problem and this passion are what got me started on this project. So, the reticulation was the problem I knew how to fix.
Of course, Dmitri also knew the best way to fix this issue: dial back the intensity of the Rodinal. While reticulation can be caused by overly strong chemistry and significant temperature changes, I thought that a lower temperature here and a slightly more dilute developer would mitigate or even eliminate the reticulation.
This belief turned out to be correct, and on inspection of both the films and the scan, there is no reticulation. However, this led to the next issue: the blue cast.
As you can see, the blue cast is very present. It can be edited out in post, but these are straight uncorrected scans, and what one should expect from this process. To me, they feel almost blue scale. It’s a fun and interesting look, but not one I necessarily seek out.
This result made a lot of sense to me once I’d thought about it. Aside from the blue base, Phoenix 200 is known for its reds and pinks. Of course, in a colour negative film, this manifests as cyan. So, as a result of a higher presence of cyan, the emulsion comes out bluer. Perhaps common knowledge, I just found it to be an interesting tidbit.

Process C: Blue cast, slightly thin in scanning, but perfect for projection.
Exposure: EI 100.
Presoak: No.
Filter: Cokin 002.
While I was testing out filters, this was the other option I pulled. Originally, I had concerns that an 85B would be too low a saturation to counteract the blue mask. However, I felt that a 002 might be too strong. I decided to test it anyway, feeling that it would be best to try two types and be wrong about which one was better.
This filter is definitely too strong. These films feel much more red scaled than a positive image. This gave me some ideas about developing Harman Red reversal, which may be similar, but would likely come with its own hurdles.
I also found this set of exposers to have more noticeable grain and other artifacts than the previous results. I quite enjoy this process as an arts film, but for any other type of result, it is not recommended.
These past three processes were all shot at the same time and developed in the same tank. This led me to believe that the filter itself is a considerable culprit contributing to these issues.
Process E: Slight amber cast, low saturation, high contrast, incredibly dense.
Exposure: EI 100.
Presoak: No.
First Developer: Rodinal 1+100 27℃/82℉, semi-stand developed for one hour with 15-second agitations every 30 minutes.
Filter: Cokin 030.
Throughout this whole process, one of the things I struggled the most with was film density. I figured that a gentler approach with the first developer would help with the density of the final result. In the end, that was a large factor in the quality of Result A.
Unfortunately, in my cautiousness, I was a bit too gentle in my original development. The resulting film was incredibly dense — so much so that viewing just the film, even on a light table, is very straining on the eye.
In order to get scans from these, I greatly increased the exposure of my scanner. This, paired with the density of the film, essentially eliminated the shadow density and saturation. While there is colour here, and it can be corrected, this process suffers from a heavy amber cast.
I believe this to be a result of the filter that I used. So, in order to remedy both the cast and the density, I increased development time and removed the filter. These changes are what took the unusable films from Process E and created the outcome of Process A.
This has been a very fun and engaging experiment, and I urge others who have the time and resources to build upon it. While I quite like the outcome of process A, I recognize the room for improvement. I’m curious about this process with redscale, as well as how one would handle Phoenix II to get good positives from it.
These processes are far from perfect, but I’m much more interested in what people create, either intentionally or accidentally, through their work towards improvement.
Much like Dmitri, I am very excited for other people’s results, and am more than happy to answer any questions that you may have.