How to Save Money on Film
25+ Practical Ideas to Save Without Sacrificing Fun or Image Quality
20 min read by Dmitri.Published on . Updated on .

Film photography can be expensive. Compared to digital cameras, which are ubiquitous and “free” to shoot, each frame on film has a price tag.
Thankfully, film can fit a wide range of budgets, with the lowest costing $5-10 per roll (with some luck) and a long list of things you can do to make it more affordable.
This guide lists 25+ practical ideas to save money on film without sacrificing fun or image quality.
I started shooting film in Thailand as an expat, earning around $700 per month for teaching English and computer science. That was a very comfortable salary by local standards; sadly, film prices weren’t any better in Chiang Mai than anywhere else, so five rolls of Kodak Ektar at today’s prices would cost me a quarter of my monthly wage. And yet, the Thai film photography community was and remains one of the most active in the world; take Chiang Mai, for example: a small city of 100,000 that hosts eight active labs or Bangkok, with its eleven and countless shops that sell film and cameras.
Today, I live in Vancouver, one of the most expensive cities in the world, where the cost of a film roll is relatively low, but our lab services, particularly for high-quality results, could be close to $50/roll. While there may be times when I’ll pay that fee or even splurge on something incredibly expensive, like Aerochrome, my costs today remain close to what I paid in Thailand, which allows me to shoot a lot more — enough to fill the pages of this blog (780+ articles/essays and counting!).
And since this is how I now earn my living, I am very serious about budgeting my film expenses.
In this guide: The greatest differentiator: lab services. Scan your film at home. Keep track of your expenses. Use free scanning and editing software. Stick to 35mm. Shoot mechanical cameras. Learn to meter using the Sunny 16 rule. Find better deals on film cameras. Learn to service your cameras. Sell your cameras. Find better deals on film. Budget film options that are as good as premium. Seek quality expired film. Bulk roll your film. Seek motion picture reels. Store your film in a fridge. Extend your film leaders. Slow down. Shoot half-frame. Develop your film at home. Develop colour-negative film at room temperature. Reuse C-41 fixer. Extend the life of your chemicals. Make your own development chemicals. Develop your colour film in sessions. Shoot black-and-white (if you develop at home). Shoot colour (if you send your film to a lab). Keep an eye on the news. Support this blog & get premium features with GOLD memberships!
The greatest differentiator: lab services.
Film prices may vary by type and location, yet the average will stay about the same (~$15 in 2026), with the cheapest options (Kentmere Pan 200 and Kodak Gold) priced at less than $10/roll regardless of where you shop. The only time you’d be expected to pay more is if those films can’t be easily imported into your country or if you are being overcharged.
However, labs don’t rely on film factories to set their prices. The development chemistry can be mixed from raw materials on premises or bought in bulk. New scanning methods, refurbished equipment, and optional printing are allowing those businesses to run leaner, with wages and space being the major contributors to price.
My recent informal survey on Threads, Bluesky, and Mastodon showed that out of 100+ participants, most are paying $15-30 for develop & scan services.
There are, of course, folks who pay a lot less, like @photostudio_42, who pays less than $5 (Ukraine) and Elton Cora (Honorary), who reported 6-7€ in Porto (Portugal). I have also spoken to Vietnamese photographers who spend just $2 per roll!
Needless to say, finding the right way to save will depend on where you are, how you shoot, and what you are willing to do to cut the expense. This guide offers plenty of options to choose from, along with advice on which may be the most appropriate for you.
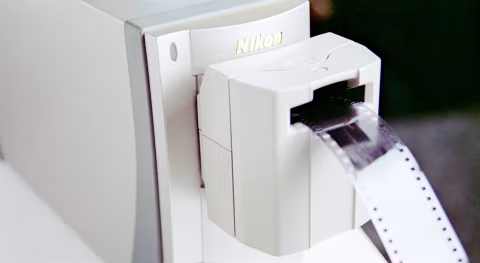
Scan your film at home.
Whatever you pay at the lab, you could save if you do it at home. In places like the US, Canada, and Europe, this would be the easiest way to cut costs. But before you can do that, you’ll need a scanner.
A dedicated film scanner can be a significant up-front investment. While that option will likely give you the best results, particularly for 35mm film, there are other avenues, like kits for digital cameras or even mobile phones. If those options aren’t suitable for you, see below for more tips!
Besides saving about half (!) of your development cost, scanning controls the most significant portion of how your images look — and there’s a good chance you’ll do a better job than your lab. With volumes that can reach over a hundred rolls per day, getting it all scanned could last unfathomably long (it’s an hour/roll for me with the edits), and so the technicians often cannot use the same tools or provide the same kind of attention to each frame as an individual photographer.
The downsides of scanning at home are the need to learn a new skill and the time it takes: up to an hour to scan a single roll, longer with editing.
Keep track of your expenses.
This may sound like a killjoy, but if you want to save money on your hobby, it is very important to be honest with yourself.
If you are a beginner, consider how often you expect to shoot film before making large investments on tools like scanners — even if they might save you money in the long run. For example, if you expose just one roll of film per month and pay $5 to develop and scan, it could take you 5-10 years to pay off your investment.
Knowing which part of your work or hobby costs you the most can also help you be more cost-effective. For example, if you can’t save much by scanning at home, you may instead focus on aspects where you can make a bigger impact on your budget, like spending less on film (see below).
Understandably, seeing unexpectedly large figures attached to a favourite hobby can feel discouraging, which is why many photographers avoid doing this. But as someone who felt that way many times, I promise that knowing the truth will feel less hurtful as you practice this work, and it will help you save money.

Use free scanning and editing software.
If you are scanning at home, your device may or may not come with film inversion software, but you may still want more control or need editing capabilities. The good news is that you don’t have to dish out hundreds of dollars or pay high monthly fees to get what you need.
Free image editors:
Darktable is an open-source, free app for macOS, Windows, and Linux. The negadoctor module works for inverting negatives with various options, including print paper simulation.
GIMP is an open-source, free app for macOS, Windows, and Linux. It’s not as fast or as capable as Photoshop, but it can do most things well.
Affinity is a fremium image editor that’s a little faster and a bit better designed than GIMP, though it requires creating a (free) account and isn’t as flexible.
Photopea is a drop-in freemium Photoshop replacement that looks like the Adobe product but works in your browser. It’s not as fast or capable as the original, but it can do a lot of the same things for free (including reading PSD format).
Free film inversion apps & methods:
You can invert your film using any of the image editors above using this manual inversion method.
If you are an Analog.Cafe GOLD subscriber, film Q is included in your membership. It can invert most file types (including camera RAW formats) in batches with one click with nothing to install on any OS.
There are several more free and affordable options, with more launching every few months.
Free scanner drivers:
If you’re using Nikon COOLSCAN and aren’t keen on shelling out an extra $200 for VueScan to make it work on a modern computer, you can try nkscan. You will need to know how to use a command-line interface on your machine (Mac, Windows, or Linux), and it won’t show you previews, but I found it much faster than the alternative.
Other free and open-source drivers may be available for your device, but you won’t need this at all if you’re scanning with a digital camera.
Stick to 35mm.
The 135 film format (commonly referred to as 35mm) is by far the most economical way to shoot film. There’s more choice and competition amongst brands for this format, and more cameras capable of shooting it.
Sure, medium and large format photography may yield higher resolution (for a price), but that’s not all there is to photography and is absolutely not required to make impactful images or even to print large.
Going smaller than 35mm will not necessarily save you money, as the 110 format can be expensive or difficult to acquire and scan in comparable quality to 135 (even if we forgive the graininess).

Shoot mechanical cameras.
Film cameras made in the 1960s can outlast their more advanced counterparts made in the 1990s and 2000s. Despite having several decades on their younger siblings, mid-century cameras generally have fewer parts, fewer or no electronic components and are often easier to fix and maintain.
Mechanical film cameras may be the most common vintage camera type sold online, as they’ve been at the core of consumer photography for most of the 20th century. There’s a greater choice, and there are many hidden gems in this category that can cost $50 or less while producing the same or better quality than the much pricier point-and-shoots. Some examples are: Voigtländer Vitomatic I, Olympus Trip 35, Kodak Retina IIa, and Miranda Sensomat.
☝︎ Further reading: “A Beginner’s Guide to Shooting Manual Film Cameras.”
Premium point-and-shoot film cameras can easily cost north of $1,000 (some sell for an excess of $10,000). Despite the price tag and build quality that often exceeds modern standards, vintage point-and-shoots can stop working unexpectedly with few or no affordable options for repair.
Servicing mechanical film cameras is often cheaper, and you can even do some or all of that work at home with just a few tools and a little know-how.
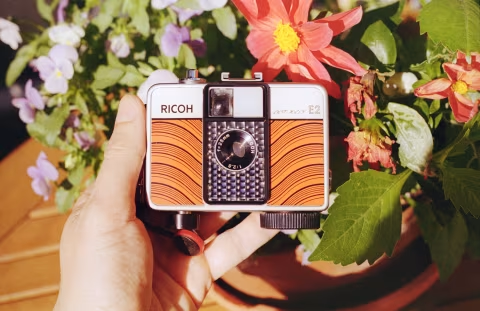
Mechanical vs. manual film cameras. Mechanical cameras don’t have to be fully manual. Many come with built-in light meters (which often require no batteries); some feature built-in coupled light meters, which will automatically adjust your mechanical shutter speeds and/or apertures. For example, Ricoh Auto Half E2 does all of that and comes with a wide “focus-free” glass lens using metal mechanical components powered by ambient light (no batteries needed).
Electronic vs. mechanical shutters. Mechanical shutters are timed using springs that can be complex, though mostly serviceable. Electronic shutters still use physical blades and curtains, but their timing is controlled by electronic components that can be difficult or impossible to repair. If your camera requires batteries to fire its shutter at any speed, it uses an electronic shutter.
✪ Note: Some cameras use a combination of electronic and mechanical shutter, where one of the speeds is mechanically actuated. For example, Nikonos V uses an electronically controlled shutter with an M90 setting, which uses a mechanical shutter at 1/90th of a second (useful if you run out of batteries but still limiting if the electronics die).
Learn to meter using the Sunny 16 rule.
While vintage mechanical cameras can be fantastic instruments, their weak point is often the light meter. It took many years of innovation to build advanced systems capable of picking the best settings for most situations — and even today those systems may have trouble with backlit images. And that could mean wasted frames (which can eventually cost you money).
This is because measuring light depends on precision and intention. For example, a perfect exposure is an image that looks as bright as you envisioned, which can sometimes mean deliberate overexposure or underexposure.
If you know your way around a light meter, you can make better choices for your images. However, that could mean another gadget between you and the photo — which could lead to wasted frames yet again (I’ve missed plenty of shots while unlocking my phone, starting an app, and tapping on dials).
A faster way to meter is to use the Sunny 16 rule. With enough practice, you can gauge the exact camera settings from a single glance at the scene in any lighting conditions. This guide explains the rules and suggests exercises: “Master the Sunny 16 Rule!”
Find better deals on film cameras.
There’s a lot you can do to ensure the camera you’re buying works properly and that you get it at the best price possible. Unlike film, the same item can easily sell for half the price at one store than at another, and there may not be a warranty at either. This guide covers everything you need to know: “The Vintage Film Camera Buying Guide.”
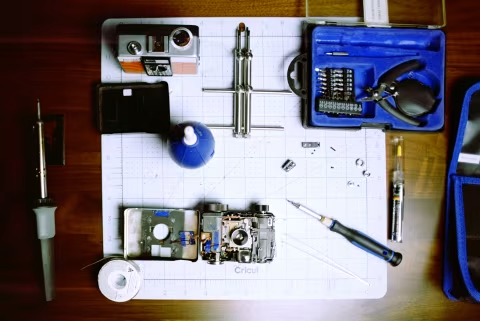
Learn to service your cameras.
One of the most common issues a film camera might have is a light leak, which could cost less than a dollar in materials to fix at home or more than $100 if you send it to a technician. Better yet, it’s relatively easy to do.
This guide will take you through those steps and cover more ways you can maintain or bring your camera back to life at home: “Home Film Camera Maintenance and Basic Repair Guide.”
Sell your cameras.
Vintage film cameras retain their value very well. Given that film photography is in a renaissance, you can even earn a bit of profit if you follow the advice in the buying guide (above), maintain your cameras well, take good photos, price them appropriately, write good descriptions, and time your sales (see: “When Is the Best Time to Sell a Film Camera?”)
✪ Note: Cheap and obscure cameras can be more difficult to sell. Consider your time and shipping costs when trading cameras.
Find better deals on film.
Film prices could be very confusing. There are more than 290 options to choose from, costing anywhere from $10 to $50 (and beyond for special films and larger formats). And the discrepancy between shops could be +/-100%.
Film Price Watch is a free web app that lists market-average prices for some of the most common films. You can segment that data by region, by several major shops, or sort the list from cheapest to most expensive.
If your shop is selling the film you’re seeking for significantly more than the market, consider their other options, as your film may be coming from any of the 13 manufacturing countries, each with its own import/export and shipping fees.
Budget film options that are as good as premium.
Fomapan Classic 100 (same as Kosmo Foto 100), Kentmere Pan 200, and Kodak Tri-X are the cheapest black-and-white films on the market today. They are all excellent films (the legendary Tri-X has joined this list after Kodak dropped its price by 30%).
Kodak Gold, Kodak Kodacolor 200 (same as ColorPlus), Kodak Kodacolor 100, and Kodak UltraMax 400 are the cheapest colour-negative films on the market today. If you can import it at the right price, Lucky C200 may also be a great affordable option within the same sub-twelve-dollar range (as of 2026).

Seek quality expired film.
Expired film can be a gamble. However, many black-and-white films can last decades past expiration, even if they aren’t stored in a fridge. Some slide films can also last well without the need to alter the exposure times. I recommend you research your options carefully and test your film one roll at a time.
Some examples of cheap expired film that will probably work are Kodak Tri-X, Kodak Ektachrome 200, and Agfa Ortho 25.
Bulk roll your film.
If you collect your used film rolls and own a cheap bulk-loader tool, you can save by bulk-rolling your film.
However, not all bulk roll prices are worth the hassle. Kodak Tri-X bulk rolls are famously a bad deal, for example. Use the Bulk Roll Calculator app to determine how much you would save with any particular option.
Seek motion picture reels.
If you can find a supplier of Kodak Vision 3 film or another 35mm movie film, you could be saving a lot more than with the typical 100’/30m bulk rolls. This can be challenging, as Kodak does not allow sale of this type of film for purposes other than motion picture events, but you may still find some if you search for “short ends.”
35mm movie reels are typically longer than the 100’/30m most bulk loaders are made for. You can find a specialty loader that will take longer lengths, but if you aren’t doing this often and are pretty good in a dark bag, you can split your reels without one (and save around $400 in the process).
Store your film in a fridge.
Photographic film retains its colours and contrast best when stored in a fridge. This includes Instax/Polaroid film (although you should not leave instant film in your freezer).
Keeping your film for longer means you can take advantage of sales when the opportunity arrives and ration your supply instead of relying on whatever’s available at the time.
Some films, like the limited-edition Polaroid frames, can increase in price over time, so you could recoup your costs by selling them later.

Extend your film leaders.
If you use certain manual film cameras, like the Vitessa A, you can take advantage of their clever clamp mechanism to squeeze 40-42 frames out of a typical 36-exposure film roll. Point-and-shoot cameras, on the other hand, may get 35-36 frames at the most, since they will typically advance the film for you as soon as you close the back.