Nishika N8000 3D — the “Wiggle-GIF” Camera Review
Inc. Exposure, and GIF-Creation Guides!
15 min read by Dmitri.Published on . Updated on .

Nishika N8000 3D was a futuristic vision of photography in the 1980s and the 1990s that failed as spectacularly as it had risen to popularity.
Today, these cameras and their copies are used to create mesmerizing “wiggle-GIFs,” brought to life by software and the internet — a life its inventors may have never foreseen.

Before screens and the internet had spread across all corners of the earth, the lenticular printing process was the only way to get images from cameras like the Nishika N8000. It was touted as the future of interactive photography.
Similar to the stereo cameras, which gained prominence in the 1800s, the lenticular printing process relied on devices with multiple lenses, but this time it used a ridged piece of plastic that refracted different parts of sliced images to create a three-dimensional effect. The images were sliced into thin strips and interlaced, then arranged beneath a refracting plastic surface that revealed one image at a time, depending on the viewing angle.
The lenticular printing process is still used today for various art projects and even in some outdoor print ads, yet it has never reached the prominence some have hoped for. Cumbersome for consumers, expensive, prone to distortions, and nearly impossible to duplicate, lenticular printing hype came to a halt in the 1990s when it became evident that manufacturers could not supply sufficient materials and that the public interest died.
Nishika N8000 3D was a consumer camera manufactured specifically to create lenticular prints. It was not the first, yet it was one of the last products of that era, as many of these cameras never left the box. I bought mine completely unused.
In the 2010s, the 3D cameras got a second wind when they were rediscovered as wiggle-GIF makers. Instead of the cumbersome print-slicing and interlacing, the film from these cameras is scanned, edited, and combined using modern software to create extremely short looping animations.
The Nishika N8000 3D, in particular, is a fascinating camera, not only for the way it works, but for the way it was made and marketed. And, of course, the kind of images that it can create today.
In this review, I’ll talk about the specs, design, the odd ways this camera feels in hand, how to compose better images, and how to scan and animate your GIFs with this strange gadget.
In this review: Technical specifications. Design and build quality. Feel in-hand: ergonomics. The 30mm Quadra Lens System. Exposure guide: aperture, shutter speed, film ISO, and focus. Scanning Nishika N800 film. How to animate wiggle GIFs. How much does the Nishika N8000 3D cost, and where to find one. More wiggle GIF examples. Support this blog & get premium features with GOLD memberships!

Technical specifications.
Lenses: 4 × 30mm (coated), “focus-free” Quadra Lens System with user-selectable apertures: f8, f11, f19.
Shutter: 1/60s.
Exposure: manual; underexposure indicator in the middle of the finder for ISO 100 film only.
Finder: brightlines and underexposure indicator.
Flash: hot shoe.
Batteries: 4 × AA (optional, only for exposure indicator dot).
Dimensions: 6.7” × 4.2” × 2.4” / 20.5oz (170mm × 107mm × 61mm / 581g).
Other: frame counter, tripod hole, shutter release socket, battery test switch button (next to rewinder crank).
There’s a reminder window on the top plate with recommended focus distances of various parts of the scene — I will explain how to use that information below. It’s made to look like a functioning LCD display, but it is not; it’s a print sandwiched between layers of transparent plastic.

Design and build quality.
This is my first camera with a fake LCD display. This is also my first camera with a piece of metal mounted inside it that serves no purpose other than to add heft.
Having picked it up for the first time, I had to take another look at the paperwork to confirm that this camera wasn’t actually marketed for children. No, they are serious.
A lot has been invested in the appearance of this camera, including the shiny plastic polish and red accents. To say this design is cosplaying as professional photographic equipment is an understatement.
Nishika N800 is not an advanced camera. It uses tiny, simple (likely plastic) lenses with no focusing mechanism. It has just one shutter speed. And its light meter is rudimentary.
All that said, this camera is well-made. Yes, it uses cheap materials and odd design choices, but it’s sturdy (and I’m not referring to the ballast), with decent tolerances between the components, and a pretty good action overall.

Feel in-hand: ergonomics.
I took my Nishika N800 on my trip to Mexico City, where I walked and used public transit a lot. It would have been much better for me if it hadn’t had that block of lead or iron mounted inside, but I appreciated the large, comfortable hand grip.
I also realized that this camera would be a lot more useful to me without batteries.
Instead of obeying the restrictive rule (found in the manual and printed inside the film chamber) requiring an ISO 100 film, I relied on my knowledge of the Sunny 16 rule and shot all kinds of film in it. However, the underexposure indicator lamp would stubbornly light up for most of my shots as the camera freaked out about me not using the expected film speed. And that lamp is right in the middle of the viewfinder.

The underexposure indicator lamp has its dedicated battery test switch on the top plate (next to the rewinder crank, pulling which upwards pops the film door open). Pushing that switch forward would light up a small red lamp on the front of the camera. All of this useless-for-me action required two AA batteries to function.
The viewfinder on Nishika N8000 is fairly comfortable and usable with the glasses on. It has the brightline framelines — illuminated by an additional window, which is nice — and is bright enough to be useful indoors or in subdued light.
The shutter and the film advance action feel a little plasticky and not nearly as refined as you’d expect from a Nikon SLR of the same age, but not bad overall. The shutter button travel is easy to control, and the camera’s heft is (and I can’t believe I’m saying this) useful at reducing camera shake for a relatively slow speed of 1/60. Pressing the shutter lets out a soft but perceptible click, followed by a slight quaking sensation in the hand — having four shutters actuate at once hits a little different.
Nishika N8000 seems to have been built at the epicentre of a ferocious conflict between sleazy marketing and good design. It’s odd, it’s fun, it’s cheaply- but well-made.
✪ Note: I found that my copy (which appears brand-new), as well as others’, may scratch film, as confirmed by samples I found online. I’ve cleaned up scratches in some of the images here, but you can see them as they were below in the wigglegram, titled “Some kind of a game?”

The 30mm Quadra Lens System.
The neat thing about human perception is that adding motion to images makes us less sensitive to the lack of sharpness. This is why, despite the relatively unimpressive optics of the Nishika N8000, it can still create images that feel rich in detail. For example, the GIF above is ¼ the resolution of the photos I typically upload to this website; it’s grainy, but, in my opinion, as detailed as it needs to be.
Another advantage these lenses have over typical photographic glass is depth of field.

Nishika N8000 is fundamentally a portrait camera. Its lenses are pre-focused on near subjects, leaving the background slightly blurry. While on a typical camera, we’d sometimes want the background in focus (for example, for landscape images), the parallax movement of the lenses is completely lost at long distances — the camera’s manual actually prescribes the most effective distances for subjects, foreground, and background. Because of that, the background is always expected to be out of focus.
Other focus-free cameras rely on small apertures and wide lenses to keep most of the scene in focus while avoiding the costly lens-focusing mechanism. They need the background to be reasonably sharp. But not Nishika. This allowed the camera’s manufacturers to add a variable aperture that can open to f8, which is quite useful for shooting slower films in subdued light, as it lets in 2-3 stops more than a typical reusable camera.
The relatively large variable aperture is exceptionally useful. While it’s not as versatile as a quality point-and-shoot, rangefinder, or SLR, it’s better than having no control. I could take my camera indoors and outdoors, where the light varied by ±3 stops, and get a good image without having to rely on flash or pushing film.

Exposure guide: aperture, shutter speed, film ISO, and focus.
The makers of this camera did their best to make its operation seem uncomplicated. Their instructions rely on the rudimentary light meter that is supposed to warn users of underexposures — but only if they use an ISO 100 film.
However, with a little more insight, you can ditch the batteries and use your knowledge of the Sunny 16 rule to instantly get proper exposures or simply dial in your film’s ISO, the 1/60th shutter speed, and the selected aperture into your hand-held light meter or a light meter app.
The icons next to the lens correspond to the following apertures:
🏡 f8 — 🌤️ f11 — f19 ☀️
With the latter being close to the whole-stop f22 or slightly underexposed at f16.
The manual also implores you to use a colour ISO 100 film for some reason, but that is not at all required. I’ve shot Ilford Delta 3200, Kodak Kodacolor 100, Lomography Lomochrome Purple (ISO ~200), and Lucky C200 films in mine.
However, the rest of the advice in the manual, such as not attempting to shoot this camera in portrait orientation, and composing scenes in such a way that its elements contribute to the 3D effect, is actually quite good:

Scanning Nishika N800 film.
Scanning Nishika N8000 film frames is a pain. They are neither half-frames nor full-frames, so you may need to crop and move the strips around quite a bit during the process. If you get any scratches on your film, you will need to take care of them one by one on each frame.
This can be a lot of work, but even after you scan and invert all your negatives, you are not yet done.
How to animate wiggle GIFs.
Before you begin converting your frames to GIFs, you will need to open them in your image editor, then: 1) align & crop, 2) duplicate, 3) export.
I used Photoshop for all the prep work, but you can use any image editor that supports layers.
Keeping track of the sequence is very important, as it can be challenging to arrange your frames in the correct order if you lose it. I typically import all the frames into layers and name them to avoid future confusion. The import order I used is the first frame as the bottom layer, the second frame as the second layer, etc.
Aligning layers (1) can be done by turning off all layers except the bottom two and setting the second one (from the bottom) to 50% opacity. You can then move and rotate the second layer around until it aligns with the layer below.
One thing to keep in mind is that your layers may never align entirely. Because the camera takes photos from different positions, parts of the images will necessarily differ. Instead of chasing perfection, your goal is to align the layers in the middle or around your subject. You can also try aligning the horizon line across the frames to further reduce the jumpy animation.
Lastly, crop parts of your frames that have film borders or empty areas to their sides.

Duplicating for full wiggle effect (2). Before you export your layers, copy frame 3 and add it after/on top of frame 4, and also copy frame 2 and add it to the very top/end of the sequence.
This should leave you with 6 frames, with the last two we just added representing the return animation. Using the original frame indexes, you should have this: 1 > 2 > 3 > 4 > 3 > 2. When looped, your frames would flow like this: 1 > 2 > 3 > 4 > 3 > 2 > 1 > 2 > 3 > 4 > 3 > 2 > 1, etc.
Exporting and animating the layers (3). In Photoshop, you can export frames as layers, which is a shortcut for doing it by hand. However, Photoshop tends to add a lot of junk to the file names, so I recommend renaming them like 1.png, 2.png, 3.png, etc., or scene-1.png, scene-2.png, etc. You can also export the images as JPEGs.
Lastly, you can use one of the numerous web apps to stitch your frames into a GIF. However, if you find that these tools offer you little control or quality, or if you run out of free credits, you can use an open-source app to do it yourself.
This tool is called FFmpeg. It’s a popular tool used by software engineers to manipulate video. If you’ve ever opened a command line, you’ll find it quite easy with the commands I’ll share below, and if not, consider giving it a try. It’s free, and it’s at the core of the vast majority of the video and image stitching tools, meaning you’ll get quality as good as any professional software could offer. Guide for installing FFmpeg.
To get the best quality GIFs from your images, you will need to first create a palette of colours FFmpeg will use with this command:
ffmpeg -f image2 -framerate 12 -i scene-%d.png -vf "scale=900:-1:flags=lanczos,palettegen=max_colors=256:stats_mode=full" scene-palette.png
Run the above command from the folder where your image sequence resides. The %d stands for a sequential number in your layer names (such as scene-1.png, scene-2.png, etc.) — you can change the scene- bit and the file extension to match your file names. scene-palette.png is a file name for the palette output; it will be useful in the next command:
ffmpeg -f image2 -framerate 12 -i scene-%d.png -i scene-palette.png -filter_complex "scale=900:-1:flags=lanczos[x];[x][1:v]paletteuse=dither=bayer:bayer_scale=4" -loop 0 wiggle.gif
The above command will use the palette and your original image sequence to generate the final animation. It uses various optimizations to ensure you get a shareable image size, but you can play around with scale=900 (horizontal resolution) and framerate 12 (12 frames per second; higher means faster wiggle).

How much does the Nishika N8000 3D cost, and where to find one.
In 2026, Nishika N8000 cameras sell for $100-$200. It’s not a rare camera; many copies are available in excellent condition. Even Amazon sells a few at a reasonable price.
❤ By the way: Please consider making your Nishika N8000 3D Film Camera purchase using this link so that this website may get a small percentage of that sale — at no extra charge for you — thanks!
More wiggle GIF examples.
I have more GIFs to show you!
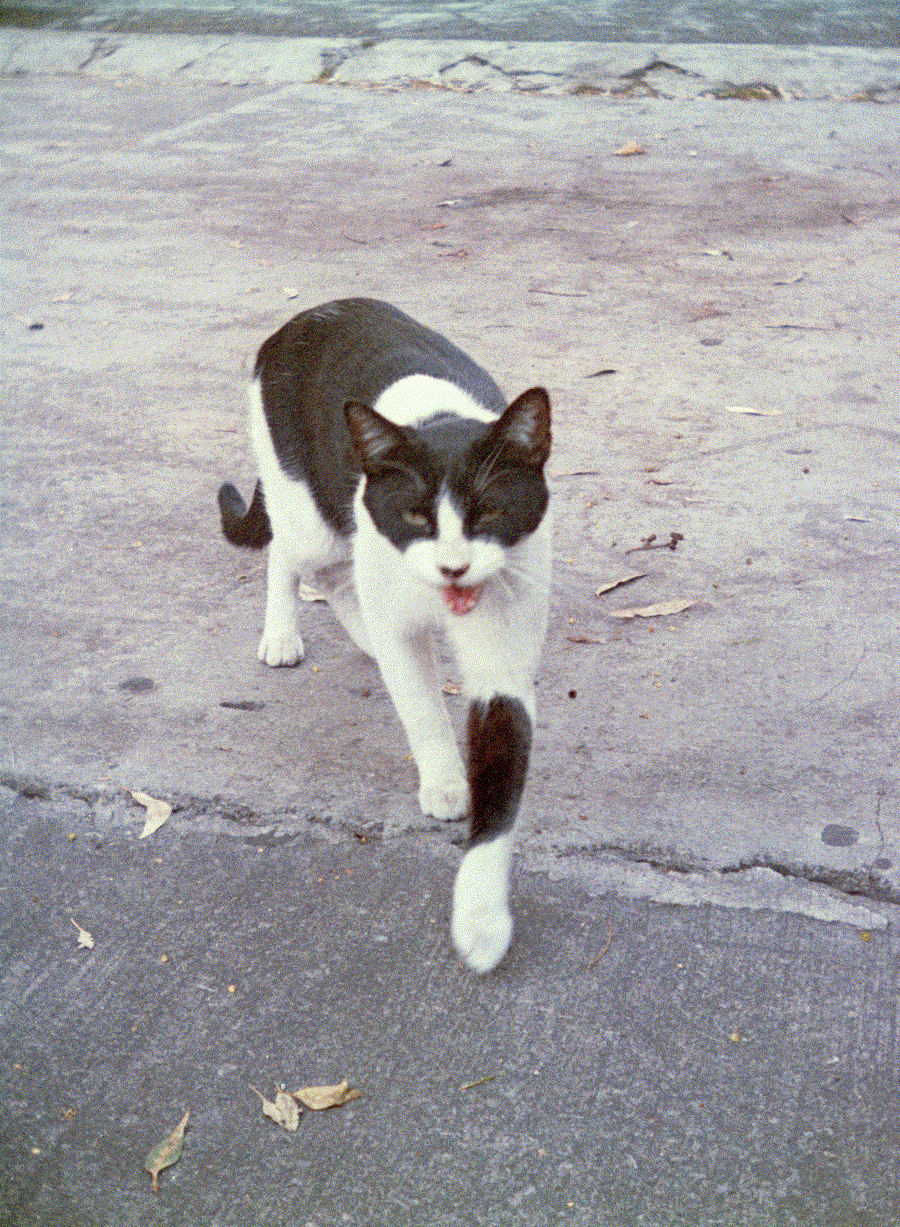
Because stitching GIFs takes considerable effort, I had to be picky with what got animated. The wiggles below are some of my favourites from a recent trip to Mexico City. Featuring: a noisy cat, a very old car, a street vendor, a very strange game, and some other stuff.