How to Make Polaroid “Sol Pints”
A New Creative Instant Film Effect
7 min read by Dmitri.Published on . Updated on .
Polaroid film is made for creative experiments. From emulsion lifts and manipulation to embroidery, soups, and cutting — exposed frames are as much raw material as a finished product.
This article introduces a new Polaroid film effect and the science behind it. Below, you’ll learn how to make your own Polaroid Sol Prints, see more examples of the art, and even get suggestions on how to take it a step further.
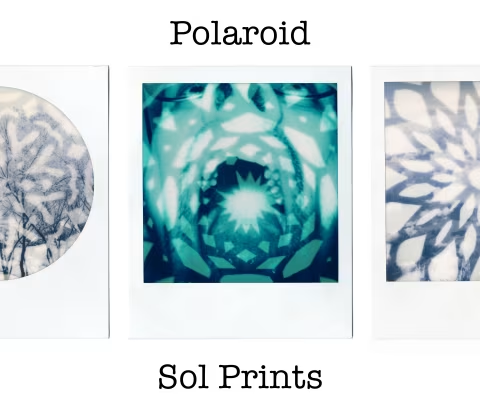
What is a Sol Print?
A Sol Print is the result of selective sun bleaching. It works with a specific type of Polaroid film. It may also work with other materials.
The Sol Print method is inspired by the chlorophyll print process, photosynthesis photography, anthotypes, and the lumen printing process.
The underlying chemical process of a Sol Print is different from the chlorophyll and photosynthesis methods; it is most similar to lumen printing, though it is not the same thing.
How to make a Sol Print: tools and materials.
Sol Prints are easy to make. You don’t need specialty tools or dangerous chemicals. However, it’s very important to use the right type of film for your project and the exposure times below. Once you’ve got everything ready, it’ll take about 10-30 minutes to finish the “design & installation” step of your project.
Here’s what you’ll need: