Future-Proof Your Film Scans With Digital Negatives
A Film Archiving Technique
6 min read by
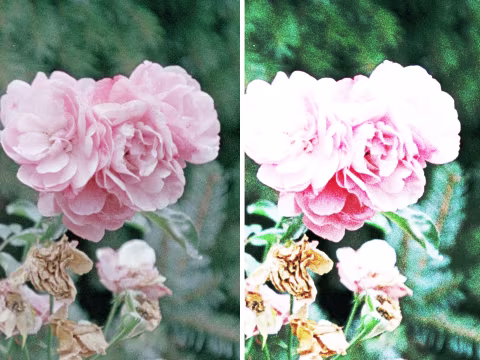
Software destroys image data.
Each colour balance adjustment, contrast change, sharpening, crop, negative inversion, and JPEG compression degrades the quality of your film scans. This may not matter to you today, but as time goes by and you add edits to your images, you may begin to notice harsh gradient banding, lowering image resolution, and harder to control colours/contrast.
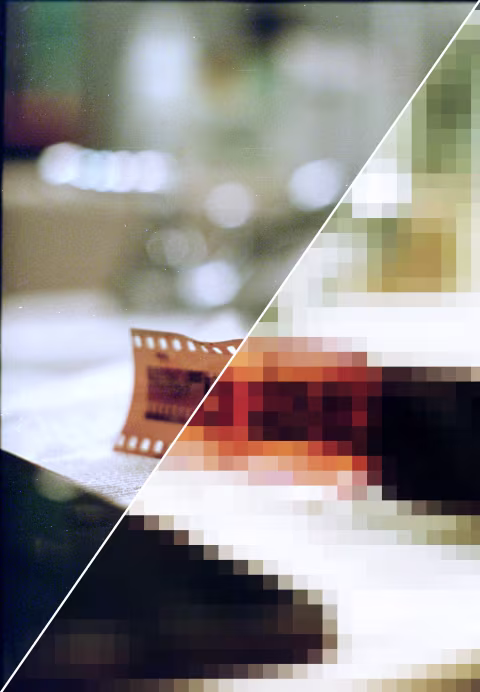
Digital negatives are master image files captured directly from a scanner. They are unedited, non-inverted digital copies of your film photographs, meant to stay untouched. You should also keep your film as a physical master; it’ll be there for you should you like to print an image in a darkroom or examine the negative. You may also update your digital negatives from your physical masters.
Digital negatives serve as a first-tier backup (since looking for the right frame and re-scanning film may be a laborious, time-consuming task). They should be the source of your significant photo edits, and they will store the most image data should you lose your physical film. I use them to generate replicable, predictable image inversions for comparing film stocks.
“Digital negative” disambiguation.
Adobe’s Digital Negative (DNG) is an open-source RAW image format. You can use that image format to save files using the technique described in this article.
Digital negative prints are digitally enlarged and printed transparencies. They are used to create contact prints that are significantly larger than the negative you may have gotten from your camera. For example, you can print an 8½×11” transparency (using a standard home printer with special printable transparency sheets) from any image and use that to create cyanotypes.
In this article, I describe digital negatives as a digital film archiving technique. This technique can work with various image formats and scanning hardware, but it does not require printing anything.
How to make digital negatives from film.
If you’re scanning your film using a macro lens and a digital camera — there isn’t much to do other than to ensure that your files are stored as RAW images and encoded at 48-bit for colour or 16-bit for black and white.
Bit depth can be thought of as the number of steps in a gradient. More bits mean smoother gradients; less is when you begin to see banding. JPEG images, for example, can store 8 bits per channel or 24 bits for RGB files (8 bits for red + 8 for green + 8 for blue). Large file formats, like RAW and TIFF, let you store double, 16 bits per channel.
✪ Note: To save space, store black and white film scans in greyscale 16-bit TIFF or RAW files. Do not use 64-bit RGBI mode; it includes additional 8 bits of infrared for removing dust and scratches (you can do this better by hand).
If you’re using a flatbed or a dedicated scanner, such as PrimeFilm XAs, your options will depend on the software that controls your scanner. It should give you an option to not invert film negatives. I’ve used it on Epson Scan, SilverFast, and VueScan.
Whichever software you use, you’ll need to find all image control options and ensure that:
☞ There’s no automatic image inversion or colour correction; all the settings should be set to “OFF” or “neutral.”
☞ Images are stored as 48-bit RGB or 16-bit greyscale files.
You may also ask your lab to provide you with digital negatives and refer them to this article if needed.
How to store digital negatives.
Digital negatives can take up a lot of space on your drive. Their size will vary depending on colour and resolution. Depending on colour and scan resolution, TIFF files may vary between tens of megabytes to 500MB per frame. DNG files are a little smaller, and PNG files tend to be quite large.
As your collection of scanned images grows, you may want to consider getting external drives and/or a cloud storage service.
To save space, you may also actively remove digital negatives you don’t plan to use in the future; for example, you can discard blurry and badly-exposed images. Ensure that you store your black and white negatives as 16-bit greyscale images and select an appropriate scan resolution/DPI (you may not want to use your device’s highest setting).
I keep my digital negatives in adjacent folders to the converted image files inside a Dropbox folder. Sometimes, I add hints to my converted files (positives) that give me an idea of what I did to achieve those results.
For more info on digital file storage and physical negative archival techniques, check out: “How to Store & Organize Film & Film Scans.”
How to convert digital negatives to usable images.
You can use your scanner software to invert your digital negatives, or you can use third-party software. Some applications will let you batch-process your files, while others will require some involvement.
I prefer to use a method that works with any image editing software that consists of three steps: inversion, equalization, and colour correction. It’s more involved, but the results are more predictable, and I have more control and understanding of the final result. This method is described in this guide: “How to Invert Colour Film Negatives in Photoshop.”
When it comes to storing the images created from digital negatives, I always use JPEG format with the quality set to 80. This is usually enough for most applications, even prints (with some exceptions). In fact, smaller files will give you more storage and online sharing flexibility; if you need more fidelity, you can make a new file out of your digital negative. 👍
Also, see “How to Scan and Edit Film Without Changing Its Look.”
Remember to save your complete images in a new file, leaving the digital negatives unaltered!
That’s all.
Again, this may seem like a lot of extra effort at first, but I believe it will help you in the future, as it did many times for me. At the very least, you will have peace of mind knowing that you’ve got your scans archived in a safe, non-destructive way.