How to Fix Expired Slide Film Colours
Automatically in Batches or Manually With Free Software
5 min read by Dmitri.Published on .
This guide will show you how to process your expired slide film scans to look as they were originally intended, using two approaches: automatic (with film Q) and manual (with any photo-editing app).
film Q lets you set up a large number of scans to process with the press of a button and view the progress on any internet-connected device. This clever app, however, uses a simple computer vision technique that you can also apply manually with free image editing apps like Gimp and popular tools like Adobe Photoshop.
In this guide: The fastest, easiest way to improve expired slide film scans in batches. How histogram stretching can “fix” expired film scans. When to use this technique. When not to use this technique. How to fix deeper issues with the slide film colours. Support this blog & get premium features with GOLD memberships!
The fastest, easiest way to improve expired slide film scans in batches.
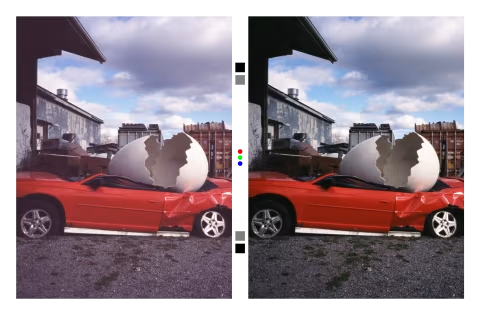
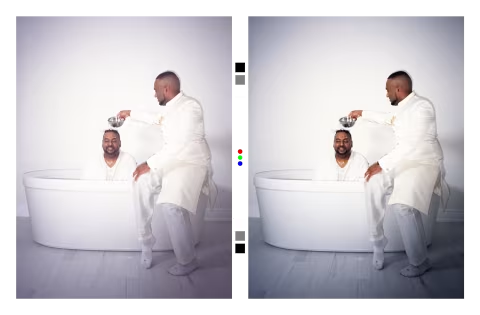
Expired slide film often shifts colours towards brown, purple, or blue, which some of you may like — but those colours aren’t how those emulsions were intended to be viewed.
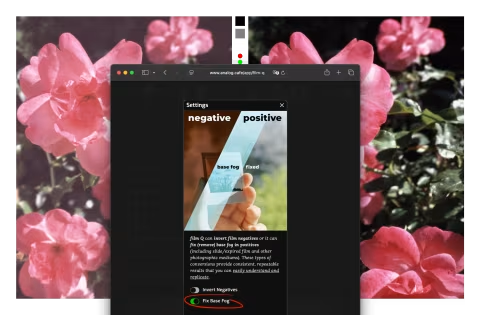
You can restore the balance of colours on your slides with film Q: connect your Dropbox account, go to Settings, select “Fix Base Fog,” then click or tap “Fix” to have all of your files processed at once without needing any further input from you.
film Q will fix the colour shifts automatically and restore the appearance of your images to how they would look if the film was brand-new.
✪ Note: The automatic fixes for colour shifts may not be sufficient for some films. Very old emulsions (30+ years expired), improperly exposed, improperly developed, or poorly scanned images may need further manual corrections or won’t work at all.
How histogram stretching can “fix” expired film scans.
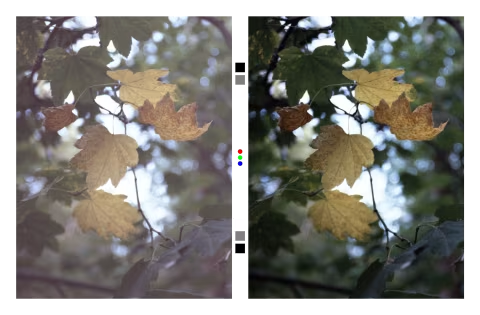
As colour film expires, chemical changes within its layers often cause the colours to drift; for example, you may notice that the shadows on certain emulsions are brown and lack contrast. At the same time, the film base, which is supposed to be transparent, can become fogged as radiation gradually passes through the light seals, colouring it in grey or a combination of colours, which leads to dull highlights.
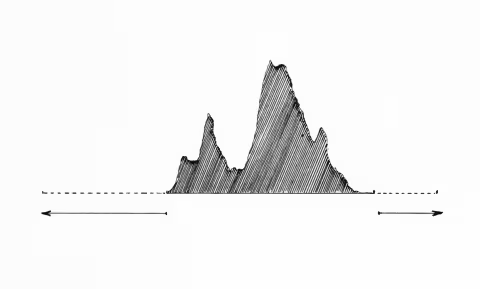
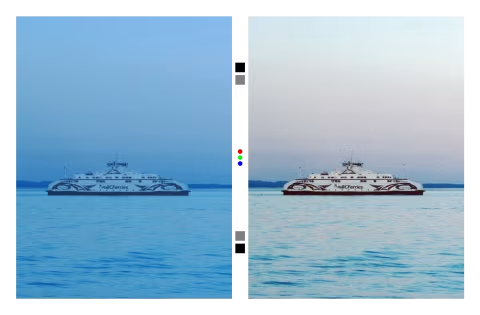
Histogram stretching is a simple computer vision technique that optimizes the contrast, tuning each individual colour channel to ensure that the darkest spot is black and the lightest spot is white. Once the colour channels are recombined, your scans can gain significant clarity, fixing the brown or coloured shadows and dull highlights to look as if it was brand new.
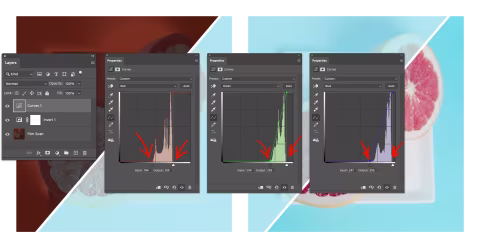
For histogram stretching to work, you’ll need to adjust each colour channel separately and ensure that the histogram is analyzing the working parts of your image (i.e., crop out the borders). With manual tools, like Adobe Photoshop, you can achieve this by cropping the image, applying a Curves layer and shifting the min/max positions for each channel closer to where the histogram begins or stops showing values.
The graphics demonstrate the workflow in Photoshop, which should be similar to most other image editing tools, including the free ones like Gimp and Dark Table:
You can learn more about the histogram stretching technique here.
film Q uses other computer vision techniques to automatically detect your frame borders and exclude them from the calculations. As it processes your photos, it creates small versions of the image with some additional adjustments to calculate the min/max positions for each channel and then recombines the entire picture back into an uncompressed file with the original borders.
When to use this technique.
Histogram stretching should improve the contrast and clarity of your scans in most cases. You can use it to renew your expired slide film scans, expired negatives, and black-and-white film scans. It’ll work with all image formats, as long as you can open them.
If you’d like to fix one or several rolls of scanned film at once, film Q will do the work for you automatically in the cloud, taking no resources on your device (and it will work on any internet-connected device).
When not to use this technique.
Histogram stretching will not fix severe colour drifts and issues where contrast and dyes fall apart completely. It may not work if the scans have already been adjusted using other techniques in certain ways.
Lastly, you may also like the low-contrast look and the colour shifts in your scans, in which case there’s nothing that needs to be done, obviously.
How to fix deeper issues with the slide film colours.
Colour shifts can be linear, or they could vary based on exposure. For example, if the tint is distributed unevenly across the frame or across the exposure range, histogram stretching alone won’t fix those issues. You will need to do more work correcting the colours manually using reference greyscale masks, which you can learn in this guide: