DIY Perfect Binding — No Book Clamps Needed
Make Full-Size Books and Zines at Home
10 min read by Dmitri ☕️.Perfect binding is a method of fastening pages without folding paper, staples, stitches, or coils. Paperbacks, photobooks, and most well-made magazines are perfect-bound.
Early in 2020, I set out to print a community magazine with the high-quality construction of a professionally printed publication but with a one-of-a-kind hand-made feel.
It just so happened that this was during the early onset of the pandemic when many shops closed. And even if I could get the book clamps, the process of using these tools would require a lot of space and time — a luxury I did not have in a small apartment and over sixty copies on back-order.
So I devised a new method that requires no book clamps, works with full-size pages (US Letter or A4), and is relatively quick to finish.
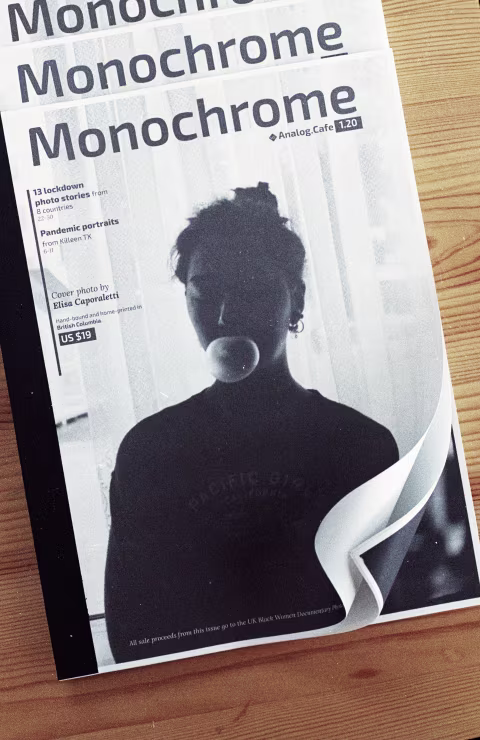
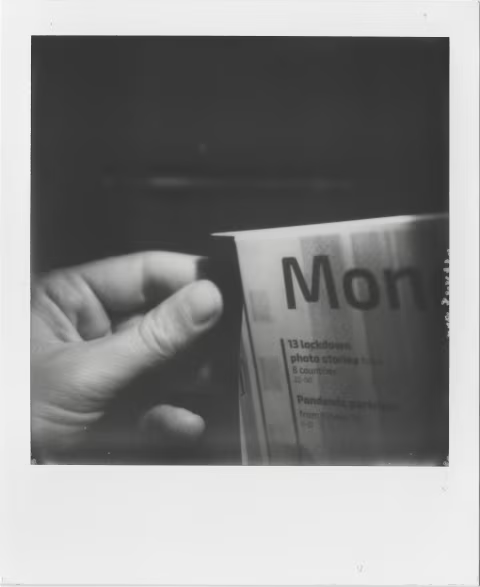
Above: Monochrome magazine vol. 1.20, made using methods described in this guide. A few copies may still be available at the Etsy shop.
Paper experiments.
It’s no surprise that I had to make a few mistakes before getting everything right, considering that I’ve settled on rather demanding requirements.
Most of the ‘zines I’ve seen, made, and bought thus far are relatively small. They typically comprise either a stack of paper folded in half, stapled in the middle or petite perfect-bound booklets made to order at a pro shop.
I wanted to maintain control over the entire process while producing a full-sized magazine with a nice finish that could have a 16x11” (40cm x 28cm) spread and wouldn’t take an hour to assemble.
It took over a hundred sheets and dozens of test copies to get it looking right. Eventually, I settled on stapling the sheets as close to the edge as possible and covering the staples with custom-sliced cardstock paper to precisely fit the magazine’s width. This method may not fit the perfect-bound description exactly, but it looks and feels just as good.
1. Preparation.
Here’s what you’ll need to get started:
A heavy-duty stapler that can penetrate all of your pages at once. I used Novus B 40 to fasten 25 sheets of 36lb sustainably sourced paper. You will need a set of staples for it as well; note that there are different sizes and widths of staples out there, so I recommend you take some time to pick the right ones for you.
An X-Acto knife/box cutter. I used an Olfa knife with a set of blades that can be snapped off. The choice is yours here, as long as it’s something that makes slicing paper really easy — it has to be sharp.
A self-healing cutting mat/board. I used a Circut mat that’s 12x12” with conveniently lined measurements. You may choose to use a wooden table or whatever else you’re comfortable slicing on top of. The marks for inches/cm on the cutting surface can be helpful.
A rafter square or a ruler that’s at least 12” long, preferable in the form of a triangle so that you can easily ensure 90° angles.
I used Empire 12” Polycast™ rafter square.
One more light plastic or wood ruler. This one isn’t for measuring but rather to help you ensure the paper is perfectly aligned — it needs to be as light as possible so that you don’t damage your work. I will explain how that works below.
Printer & paper. This is obvious though I would recommend you make your choices based on environmental considerations — look for Forest Stewardship Council certifications or similar. I used Epson ET-M2170 to print my magazine in monochrome, duplexed, for the best-in-class ink economy.
Cardstock for the spines. Spend some time selecting the right colour and texture for the spine that’ll wrap around your book and cover the staples. For my print, I chose Recollections black heavyweight cardstock.
A pencil. To mark your cuts.
Paper or wood glue and a brush. You will also need a small jar of water to moisten your brush (which should be about a pinky finger in width). I used Gorilla wood glue. You should also have some scrap paper and a moist towel to control your spills.
Pliers, I used Mastercraft. They will need to be something that’s comfortable to hold in hand as you’ll need to exert a fair amount of pressure to flatten your staples.
Paper clamps. You will be using paper clamps to keep the paper stacked perfectly together. Paper clips may not work as well.
Workspace. Any table will do, but make sure it is also a well-lit area.
2. Staple your booklet (2 min).
Essentially, the book is going to be stapled first and then those staples will be covered up by a spine. I will explain, below, how to make sure that the staples never show and your book looks and feels perfect-bound.
Stapling your paper together is an important step as it will dictate how your package’s rims will look in the end. The idea is to make sure that the pages are perfectly aligned, forming nice, flush edges. No papers should stick out or dip.
To accomplish that, you will need to first stack your paper on the table, as you usually would (i.e. standing up). Then, use the light ruler to lightly tap on the top of the paper stack as you hold it firmly in your left hand, assuming you’re right-handed. You will notice that the pages will gradually align to form a nice, flat edge — be careful not to dent them with the ruler’s edge. Now turn the pages on to their side and repeat the procedure at the long edge. Do this until you’re satisfied with how your pages are stacked — the goal being an edge that’s flat like that of a well-bound book.
Next, apply paper clamps near your stacked paper spine’s edge, as shown in Figure 2 above. It’s now safe to let go of your stack as the clamps should hold it nicely together with the pages perfectly aligned.
Now that the stack is secure, you can apply staples to the spine edge. I used three, about a quarter-inch (~6mm) away from the edge. Try to ensure that the pages are relatively flat as you staple so that your booklet isn’t fixed in a bent position with your staples.
Your next step is to ensure that the stapes do not bulge under the cardboard spine we will be applying next. The best way to do that is to squeeze them hard with your pliers. Do not worry about damaging the paper on the edge, as it’s all going to be covered up.
3. Make the cardstock spine (5min).
This may be the trickiest piece of the puzzle, though most of the work is just ensuring that the cuts are well-measured and are straight.
Cut the cardstock so that its width matches the long side of the papers as closely as possible (you may not need to do this if your card stock comes in the same size as your paper).
Measure the thickness of your stacked papers — mine was ⅛” or about 3mm. Now measure and mark about ¾” from the side of your cardstock, then ⅛” (or whatever the thickness of your paper stack is), then ¾” again. You are looking to create a U-shaped spine for your book; see Figure 5.
Before you slice 1⅝” spine strip from the cardstock, drag your knife lightly over the ¾” and ⅞” marks so that it will be easy to fold it at those marks neatly.
These ratios are a little hard, so here’s a metric version: 2cm + 3mm (the thickness of your paper stack — you will need to measure this yourself) + 2cm. The total width of the spine, in this case, is 43mm — but before you cut it, you are dragging your knife at the 2cm and 23mm marks so that it’s easier to fold.
Your rafter square should make cutting at a right angle relatively easy. The cutting mat will ideally provide the grip for your cardstock as well.
Here’s something to consider: when making the design for your front and back covers, keep in mind the spine and how it will interact with them.
4. Glue the spine.
This is the final step. You’ve ensured your pages align perfectly. You stapled them and flattened the stapes so that they don’t bulge. You’ve cut your spine. Now, carefully place your spine on a sheet of paper you don’t mind getting glue on face down.
Apply your glue with a brush and a little bit of water to give yourself a bit extra time before it dries. Do your best not to get any glue on the facing side of your spine.
Once done, place the spine so that the bottom part of the U-shape touches the paper edges first and then carefully “close” it over your book, as shown in Figure 1 above.
Remember, the reason you’re doing all this work instead of using something like a book tape is quality and appearance. Book tape is a janky solution that will never hold up to an all-paper construction we’ve got here.
Samples.
If you aren’t sure if this method is right for you, consider buying a copy of a book or a magazine bound using this very technique at the Analog.Cafe shop. And if you’re having trouble with any of the steps above or would like to provide some feedback, feel free to contact me.
Good luck with your bookbinding!